Webflow Tutorial: Play Video When Clicking a Custom Icon

Written by

Pardeep Verma
CMS developer
Table of contents
Build with Radial Code
Share this
In this blog post, we’ll walk through how to set up a video that plays when clicking a custom icon in Webflow. We'll use a simple, clean structure with a bit of custom code. You can easily achieve this interaction, even without needing complex coding skills.
Let's break down the steps!
Step 1: Set Up the Basic Structure
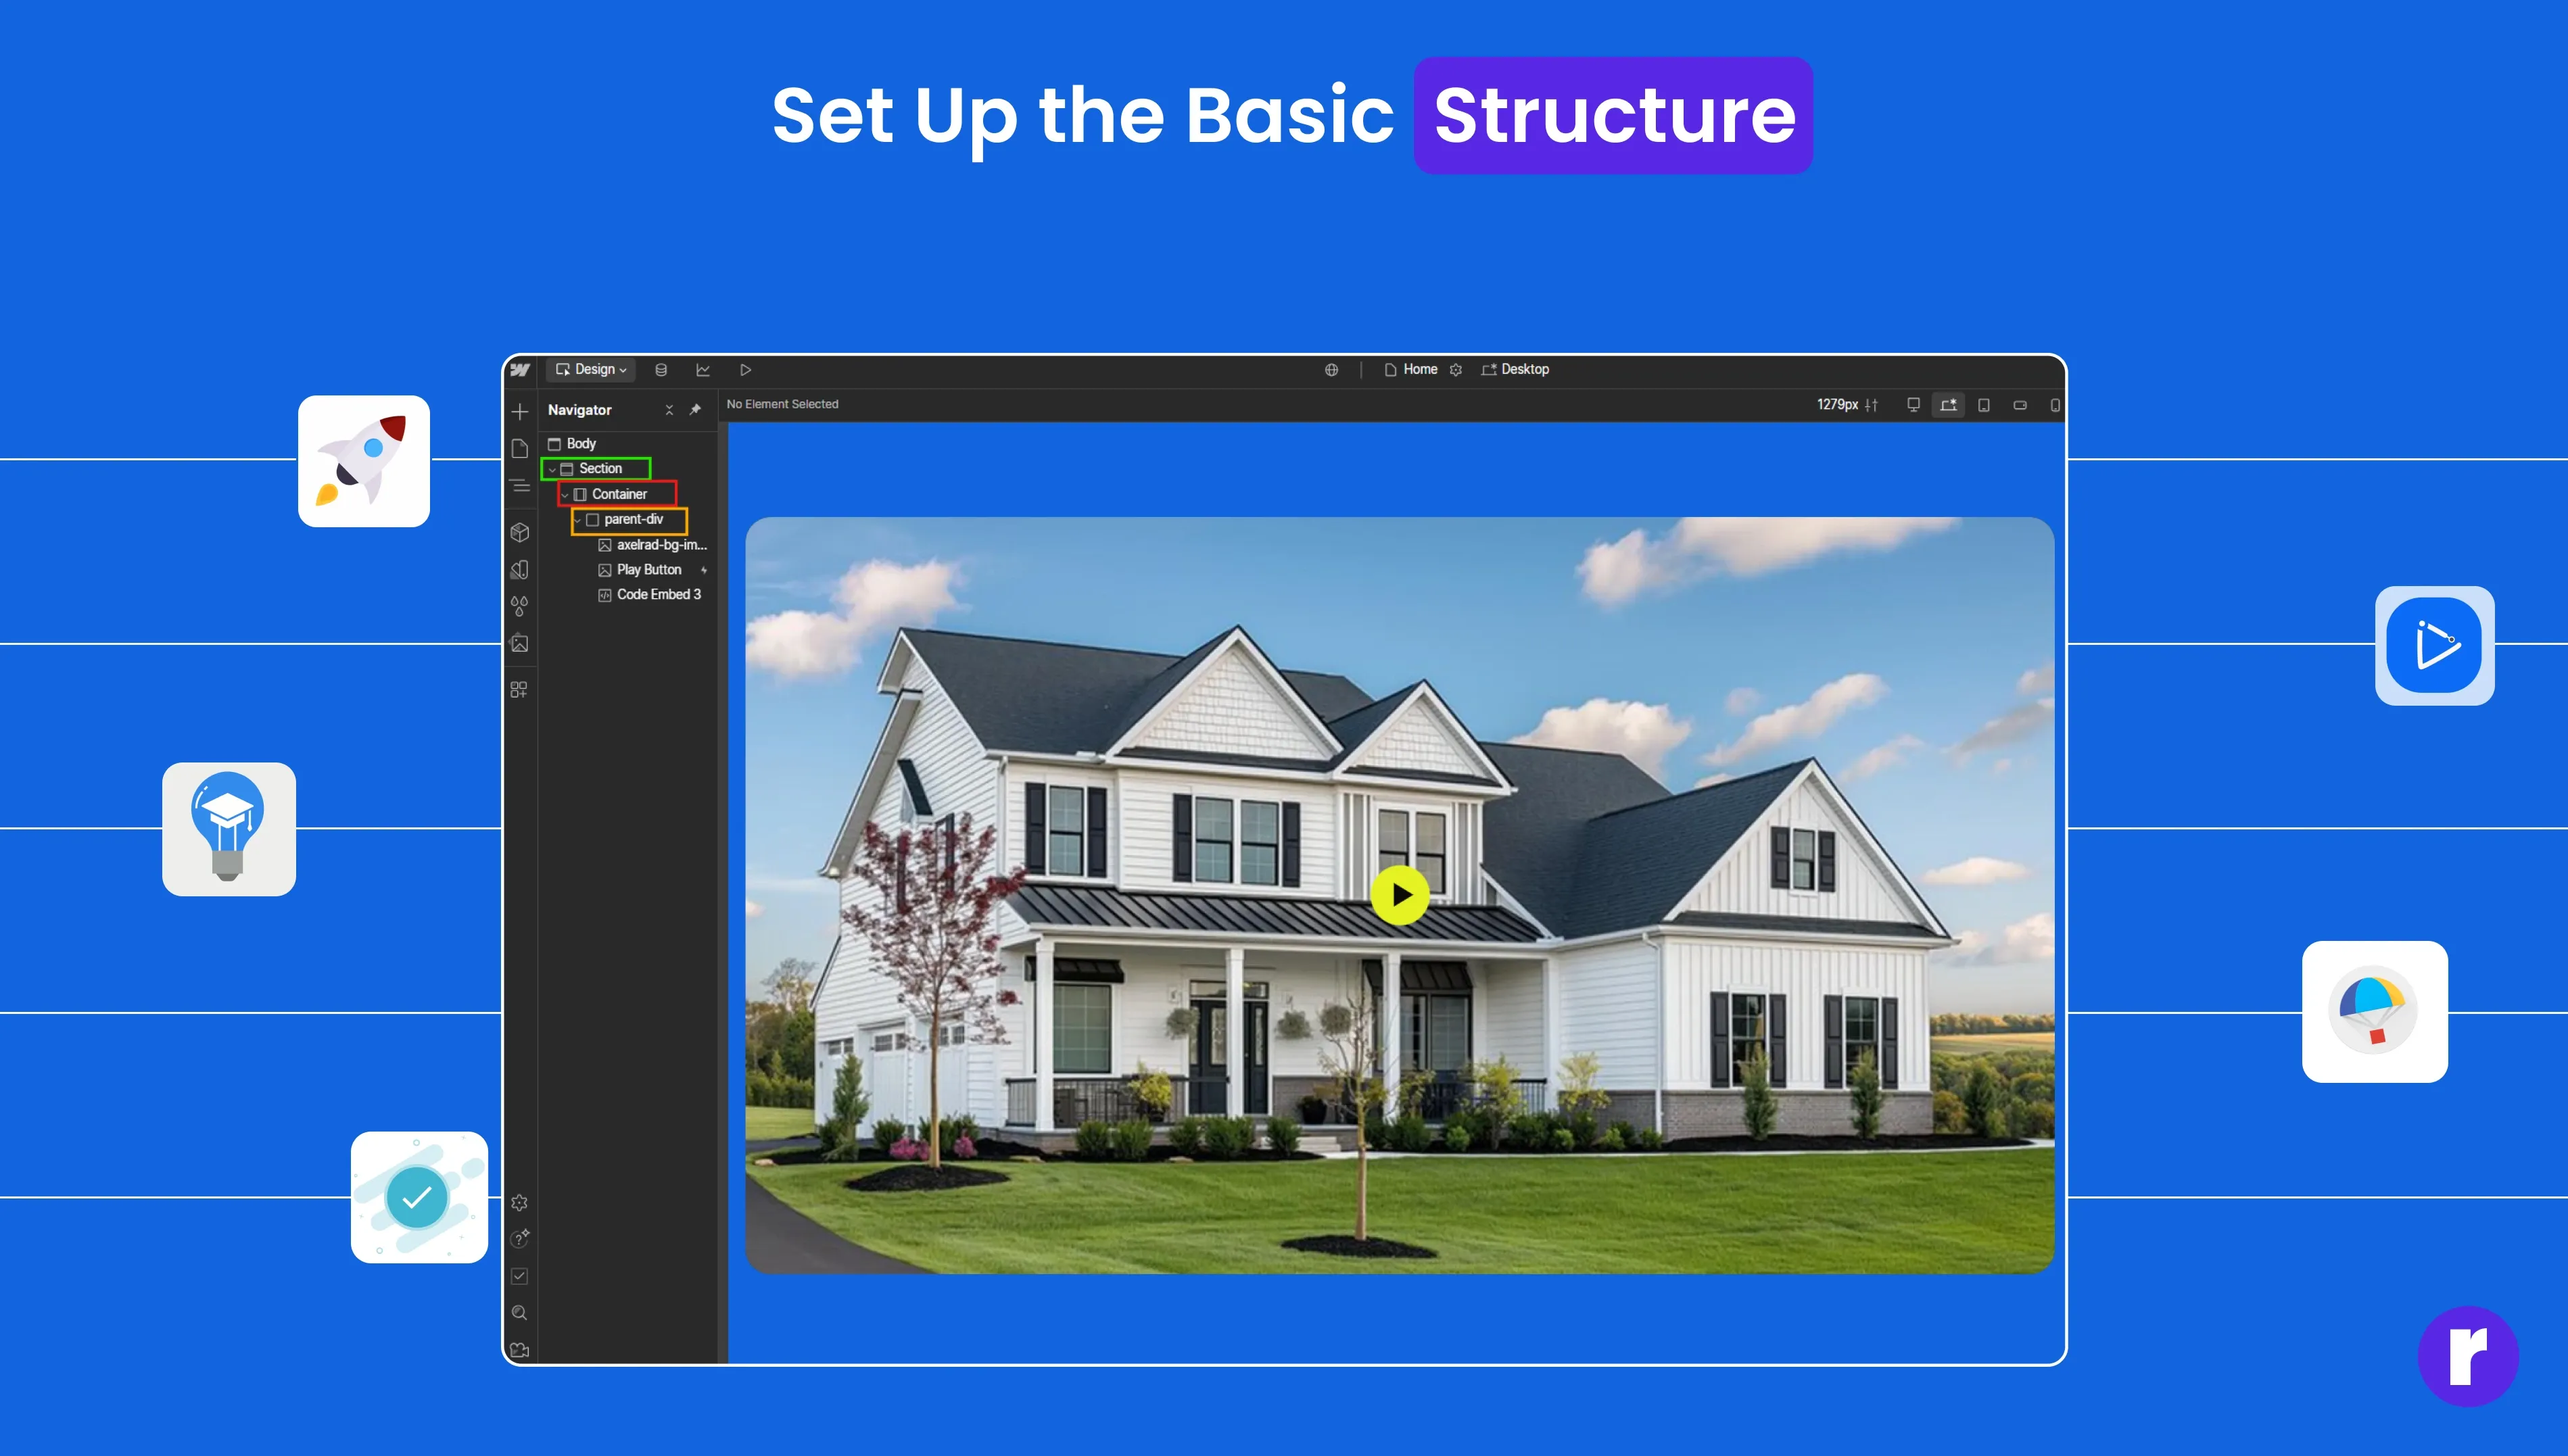
- Drag a Section: Start by dragging a Section element to your page.
- Add a Container: Inside the Section, add a Container.
- Add a Div Block: Now, drag a Div Blockinside the Container.
- Name this Div (for example, class-name) to give it a unique identifier.
Step 2: Set a Fixed Height for the Div
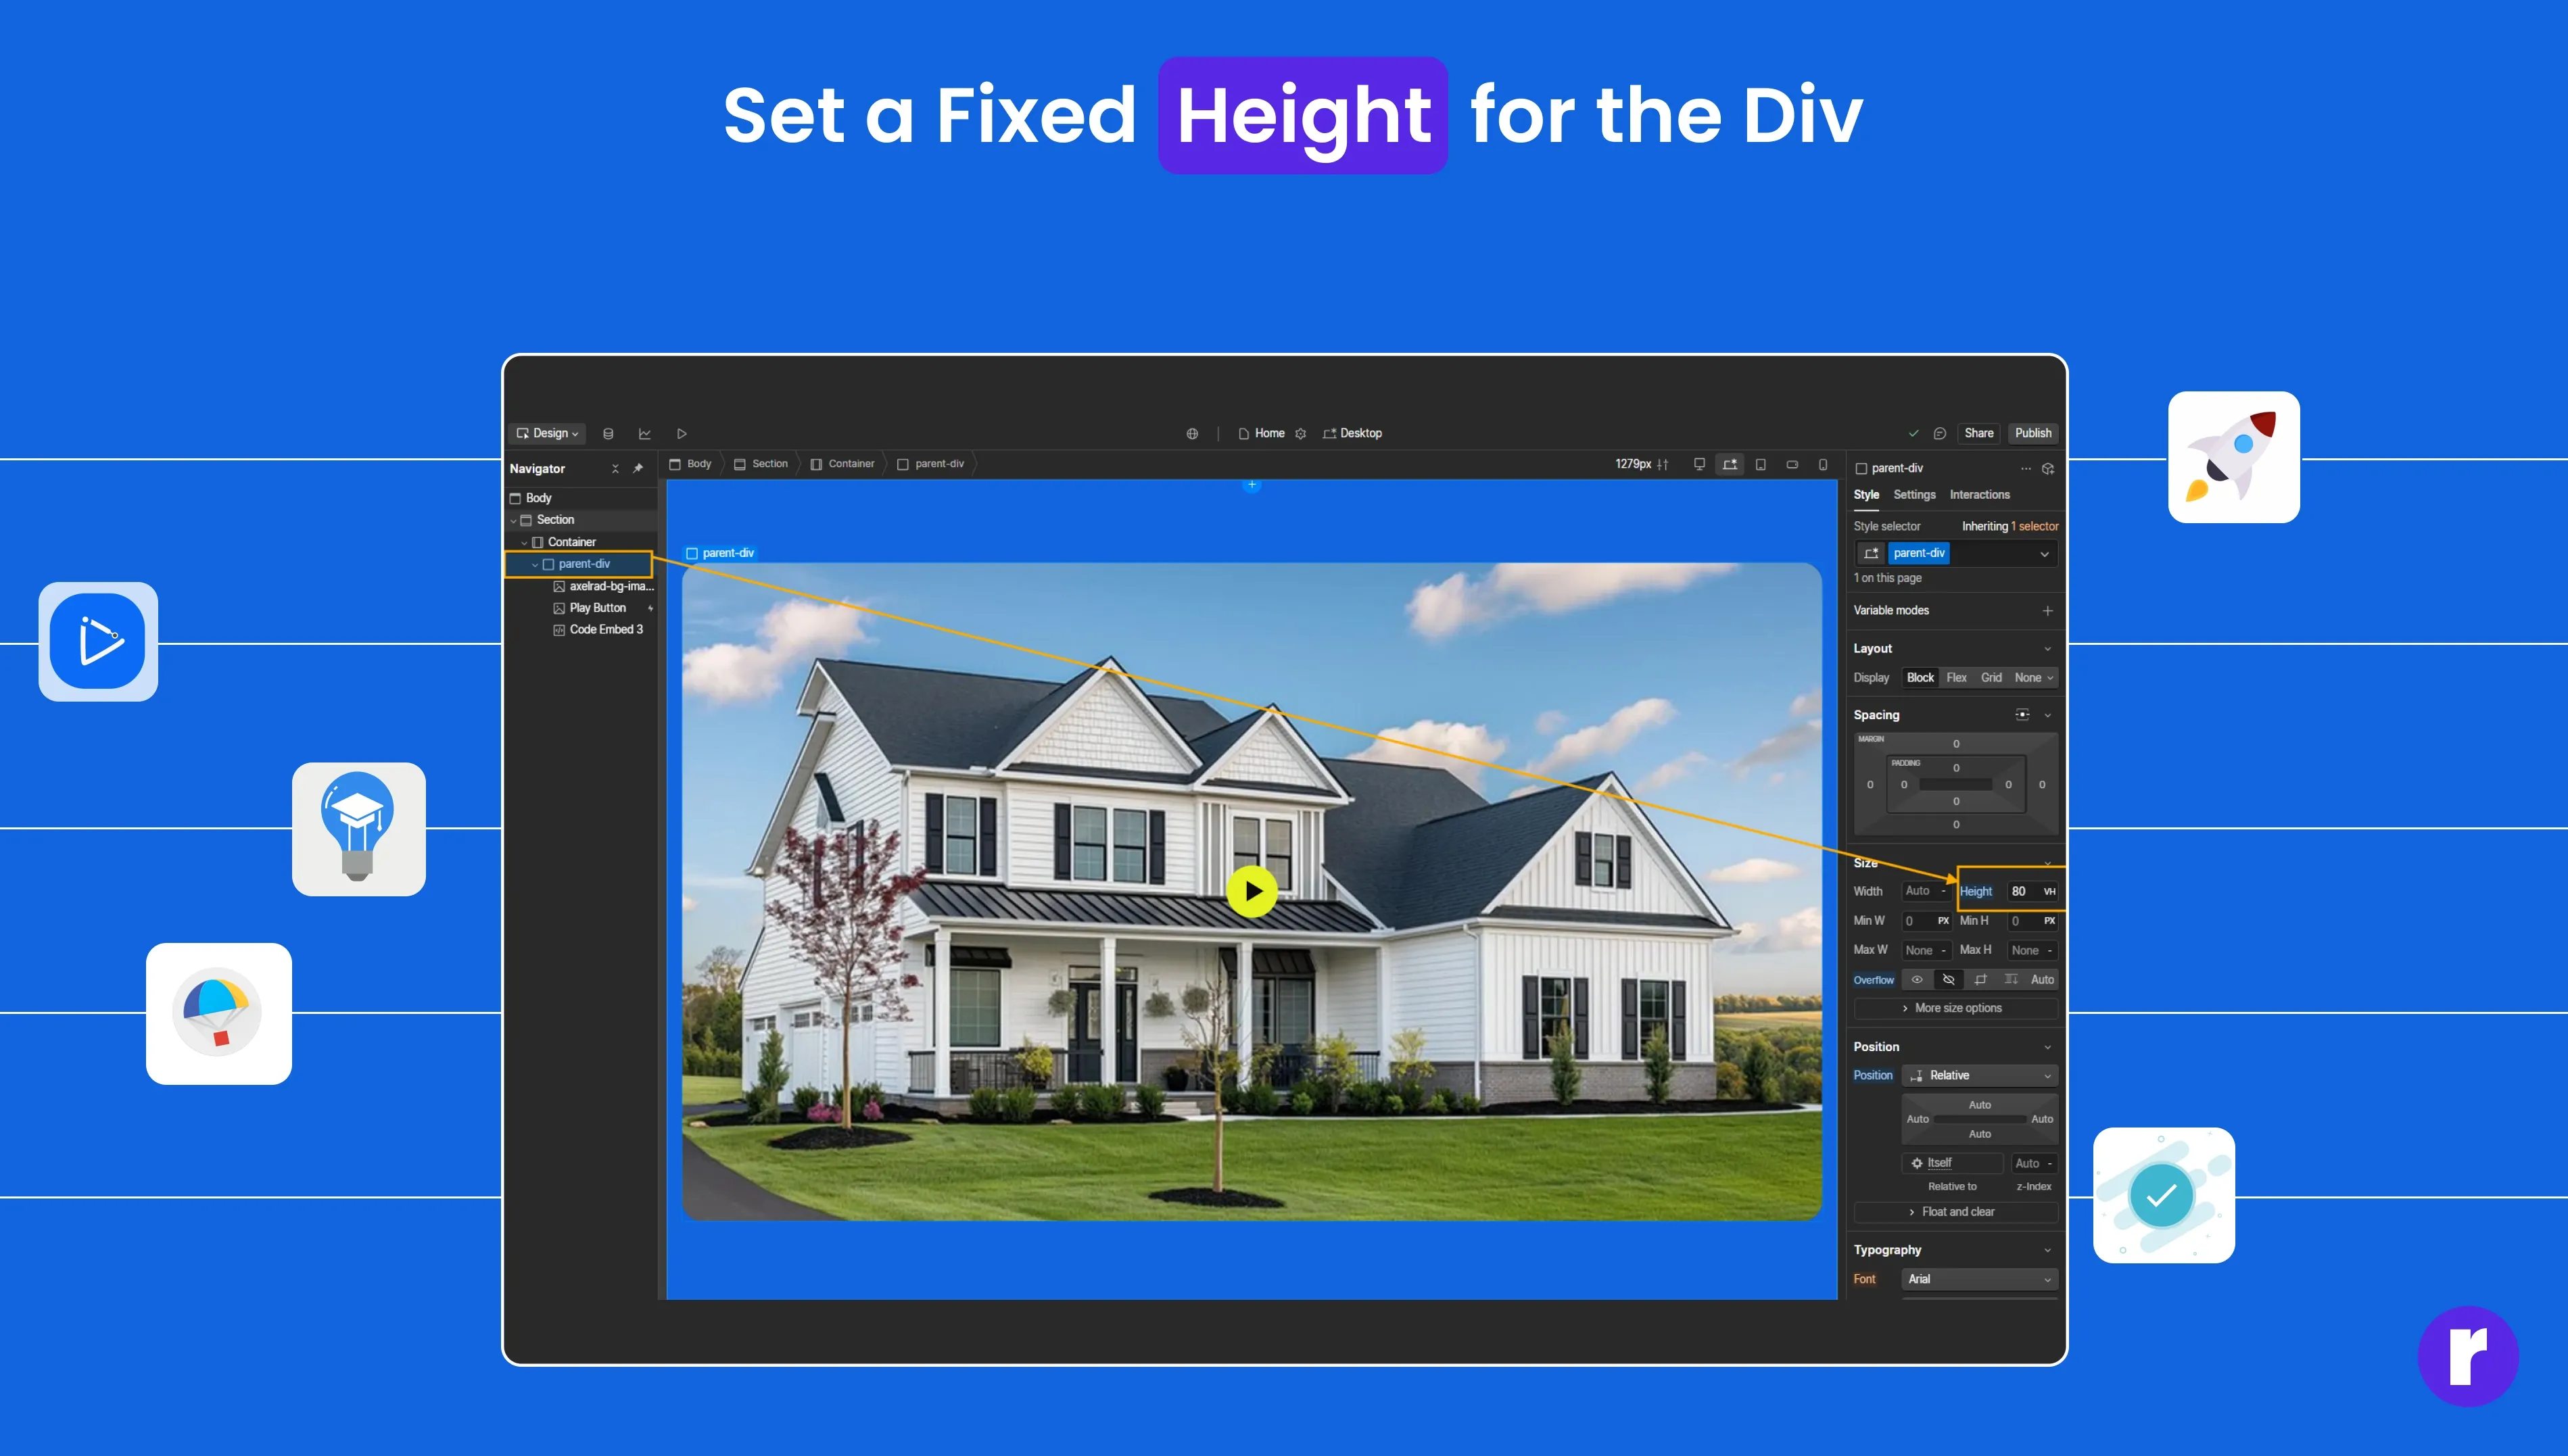
To ensure your video is displayed properly, give the Div Block a fixed height.
You can set this in the Style panel:
- Select your Div Block.
- Set the height (e.g., 500px).
Step 3: Set Position to Relative
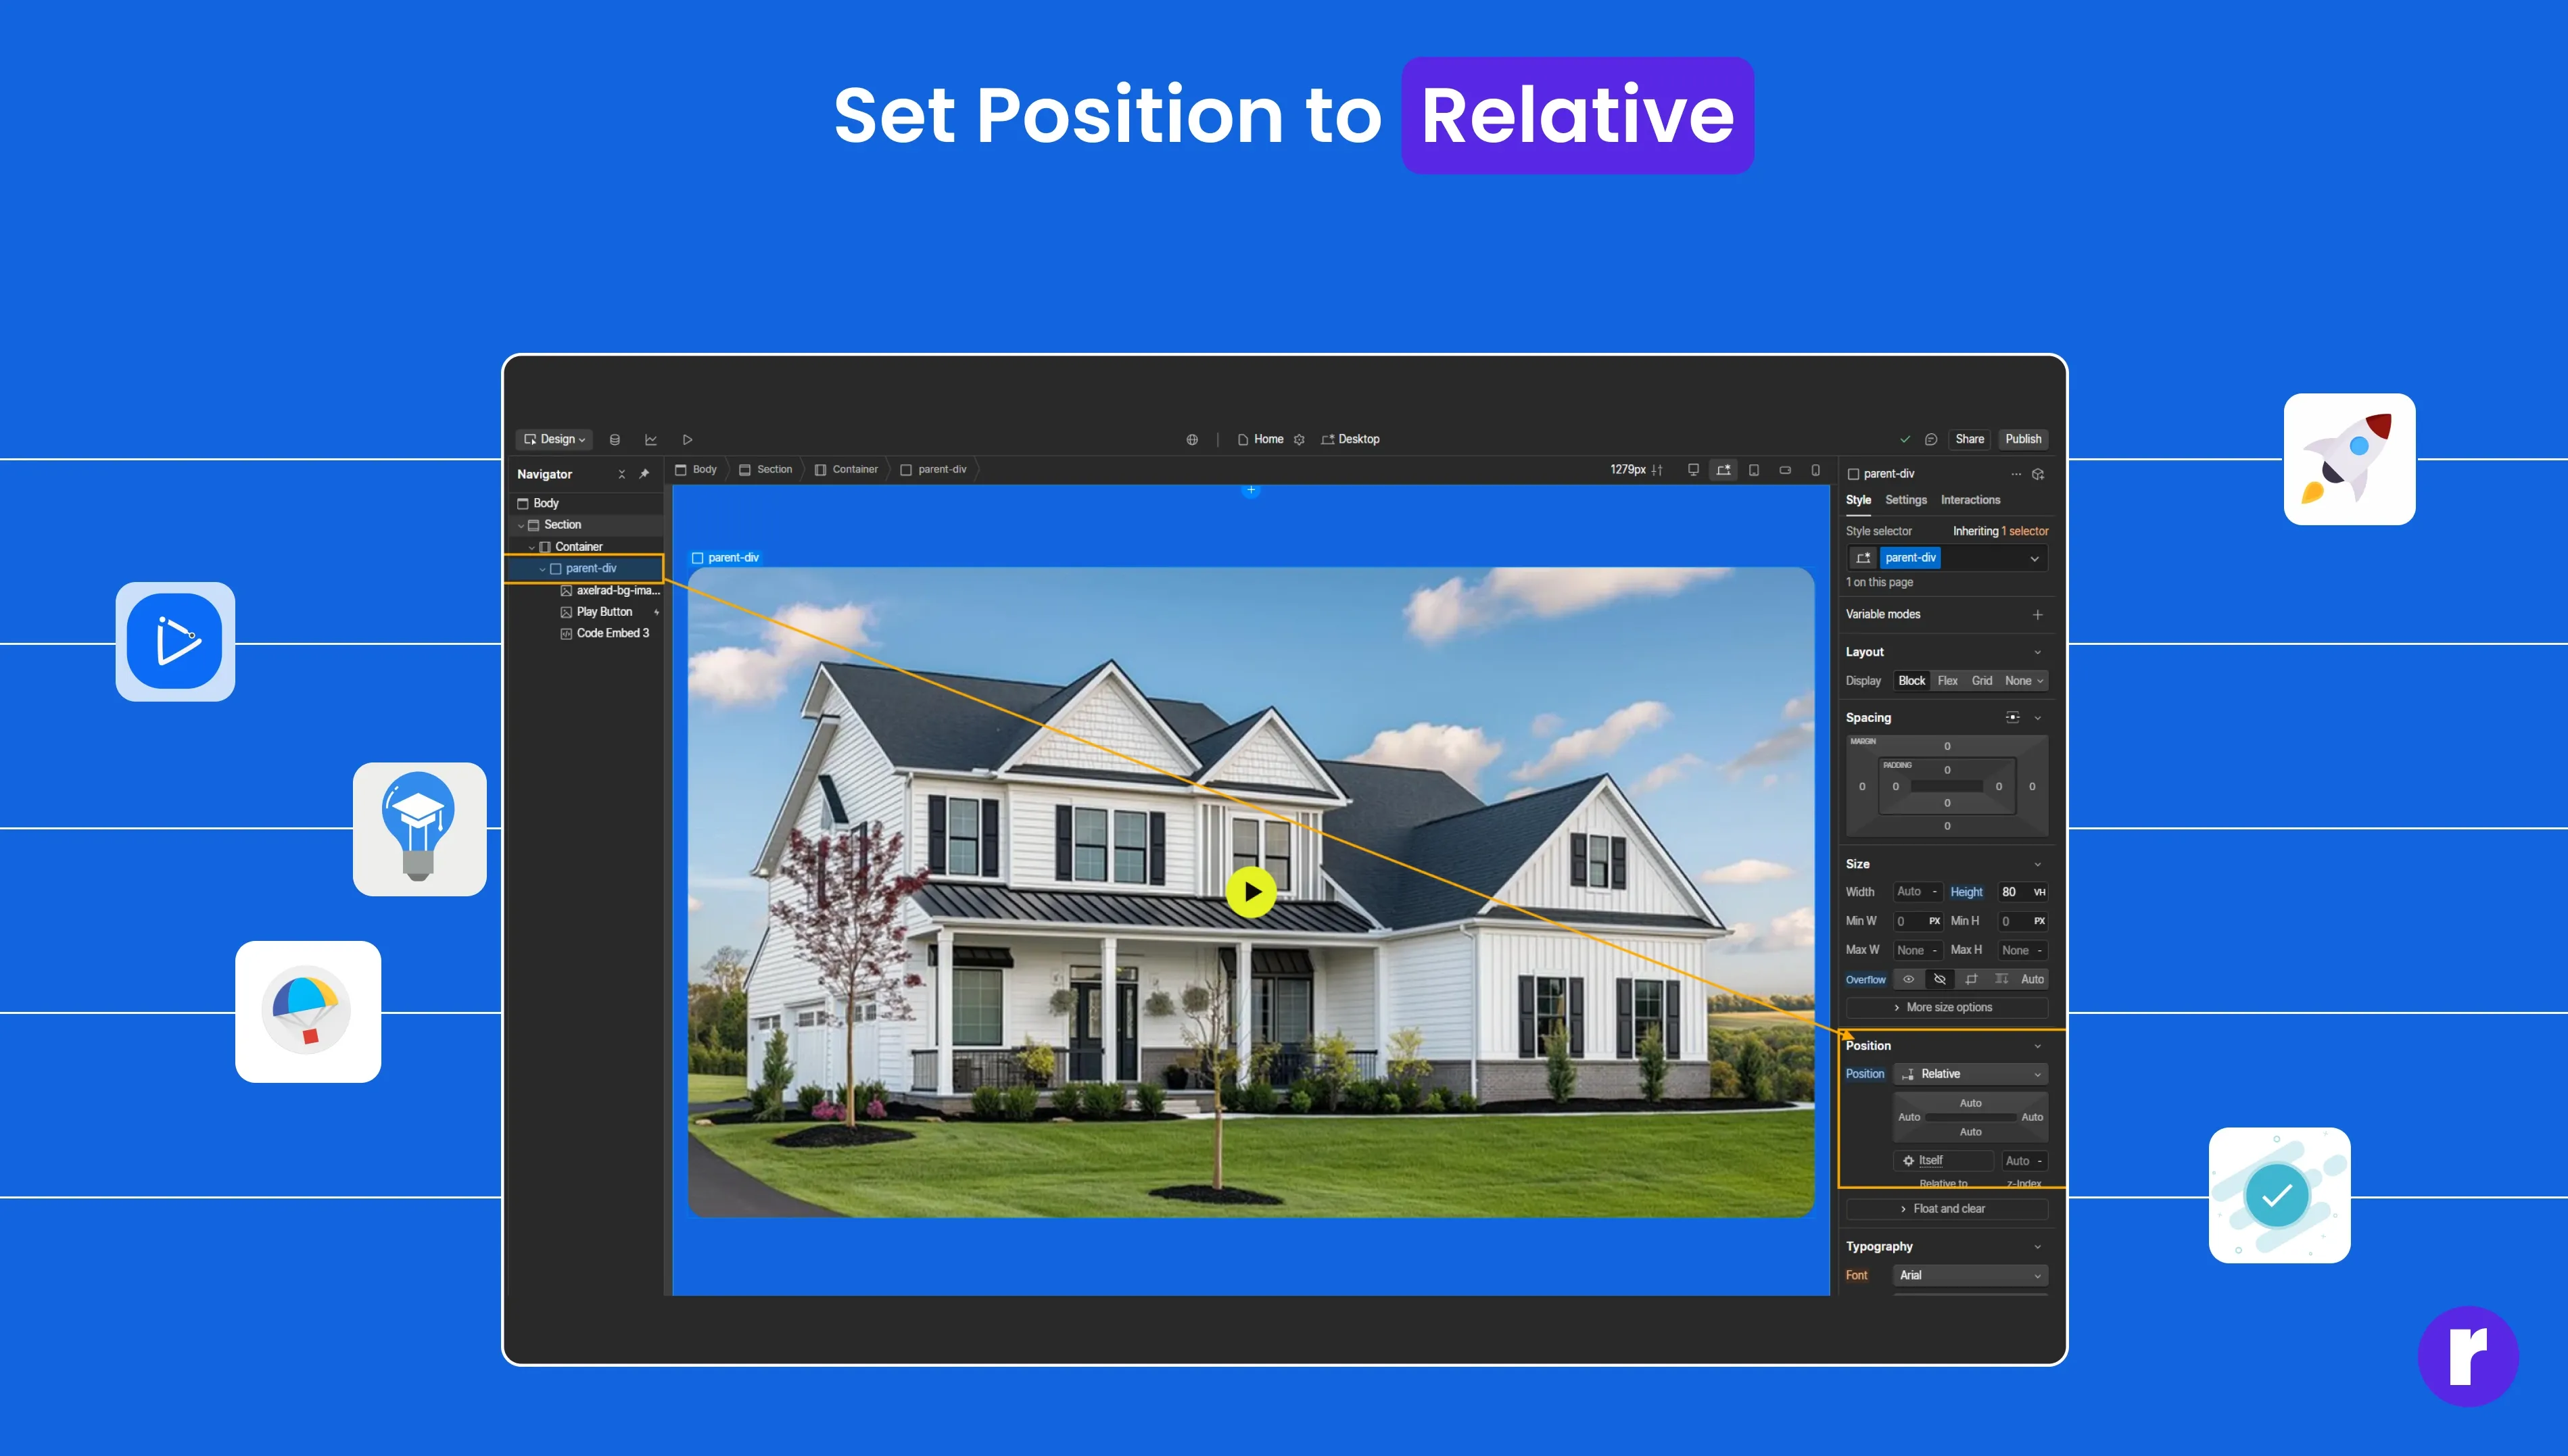
Now, we need to position our elements correctly.
- Select the Div Block and go to the Style Panel.
- Set the position to relative.
- Add a Div Block: Now, drag a Div Blockinside the Container.
- This is necessary for positioning the overlay image and play button properly within the Div.
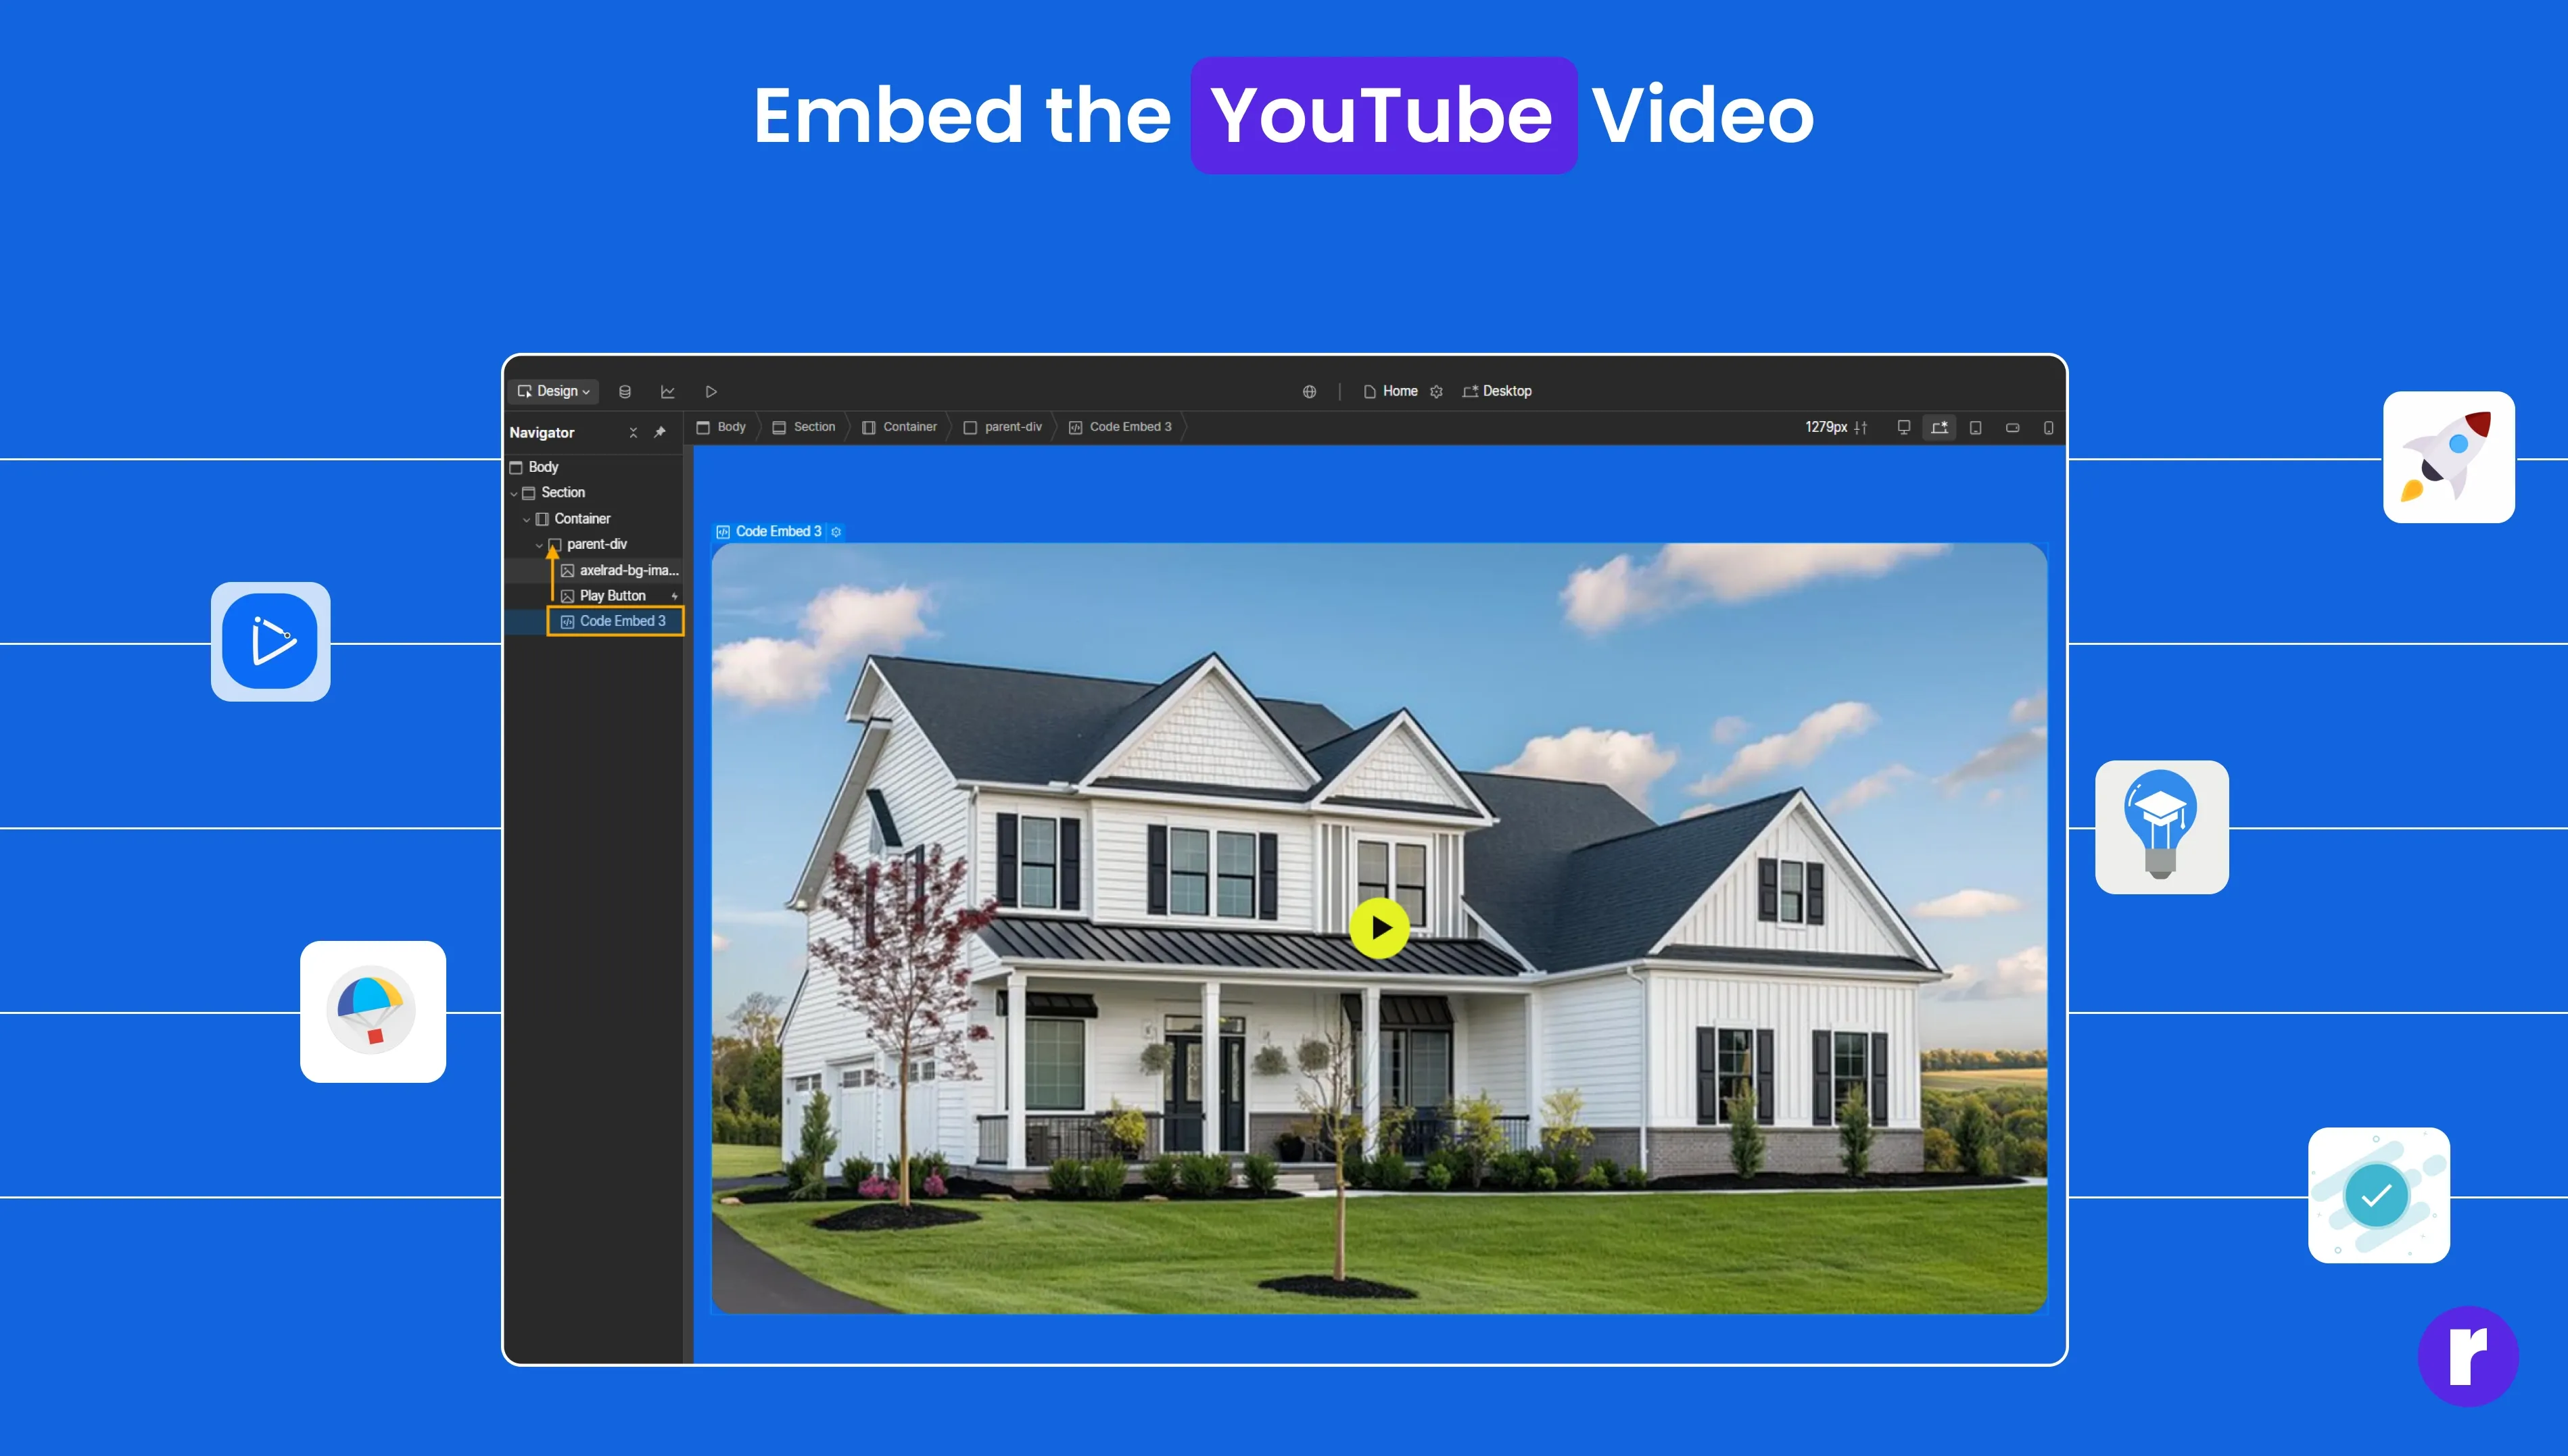
Step 4: Embed the YouTube Video
Now, we need to position our elements correctly.
- Drag an Embed Code element inside the Div Block (class-name).
- Paste the following code into the Embed element:
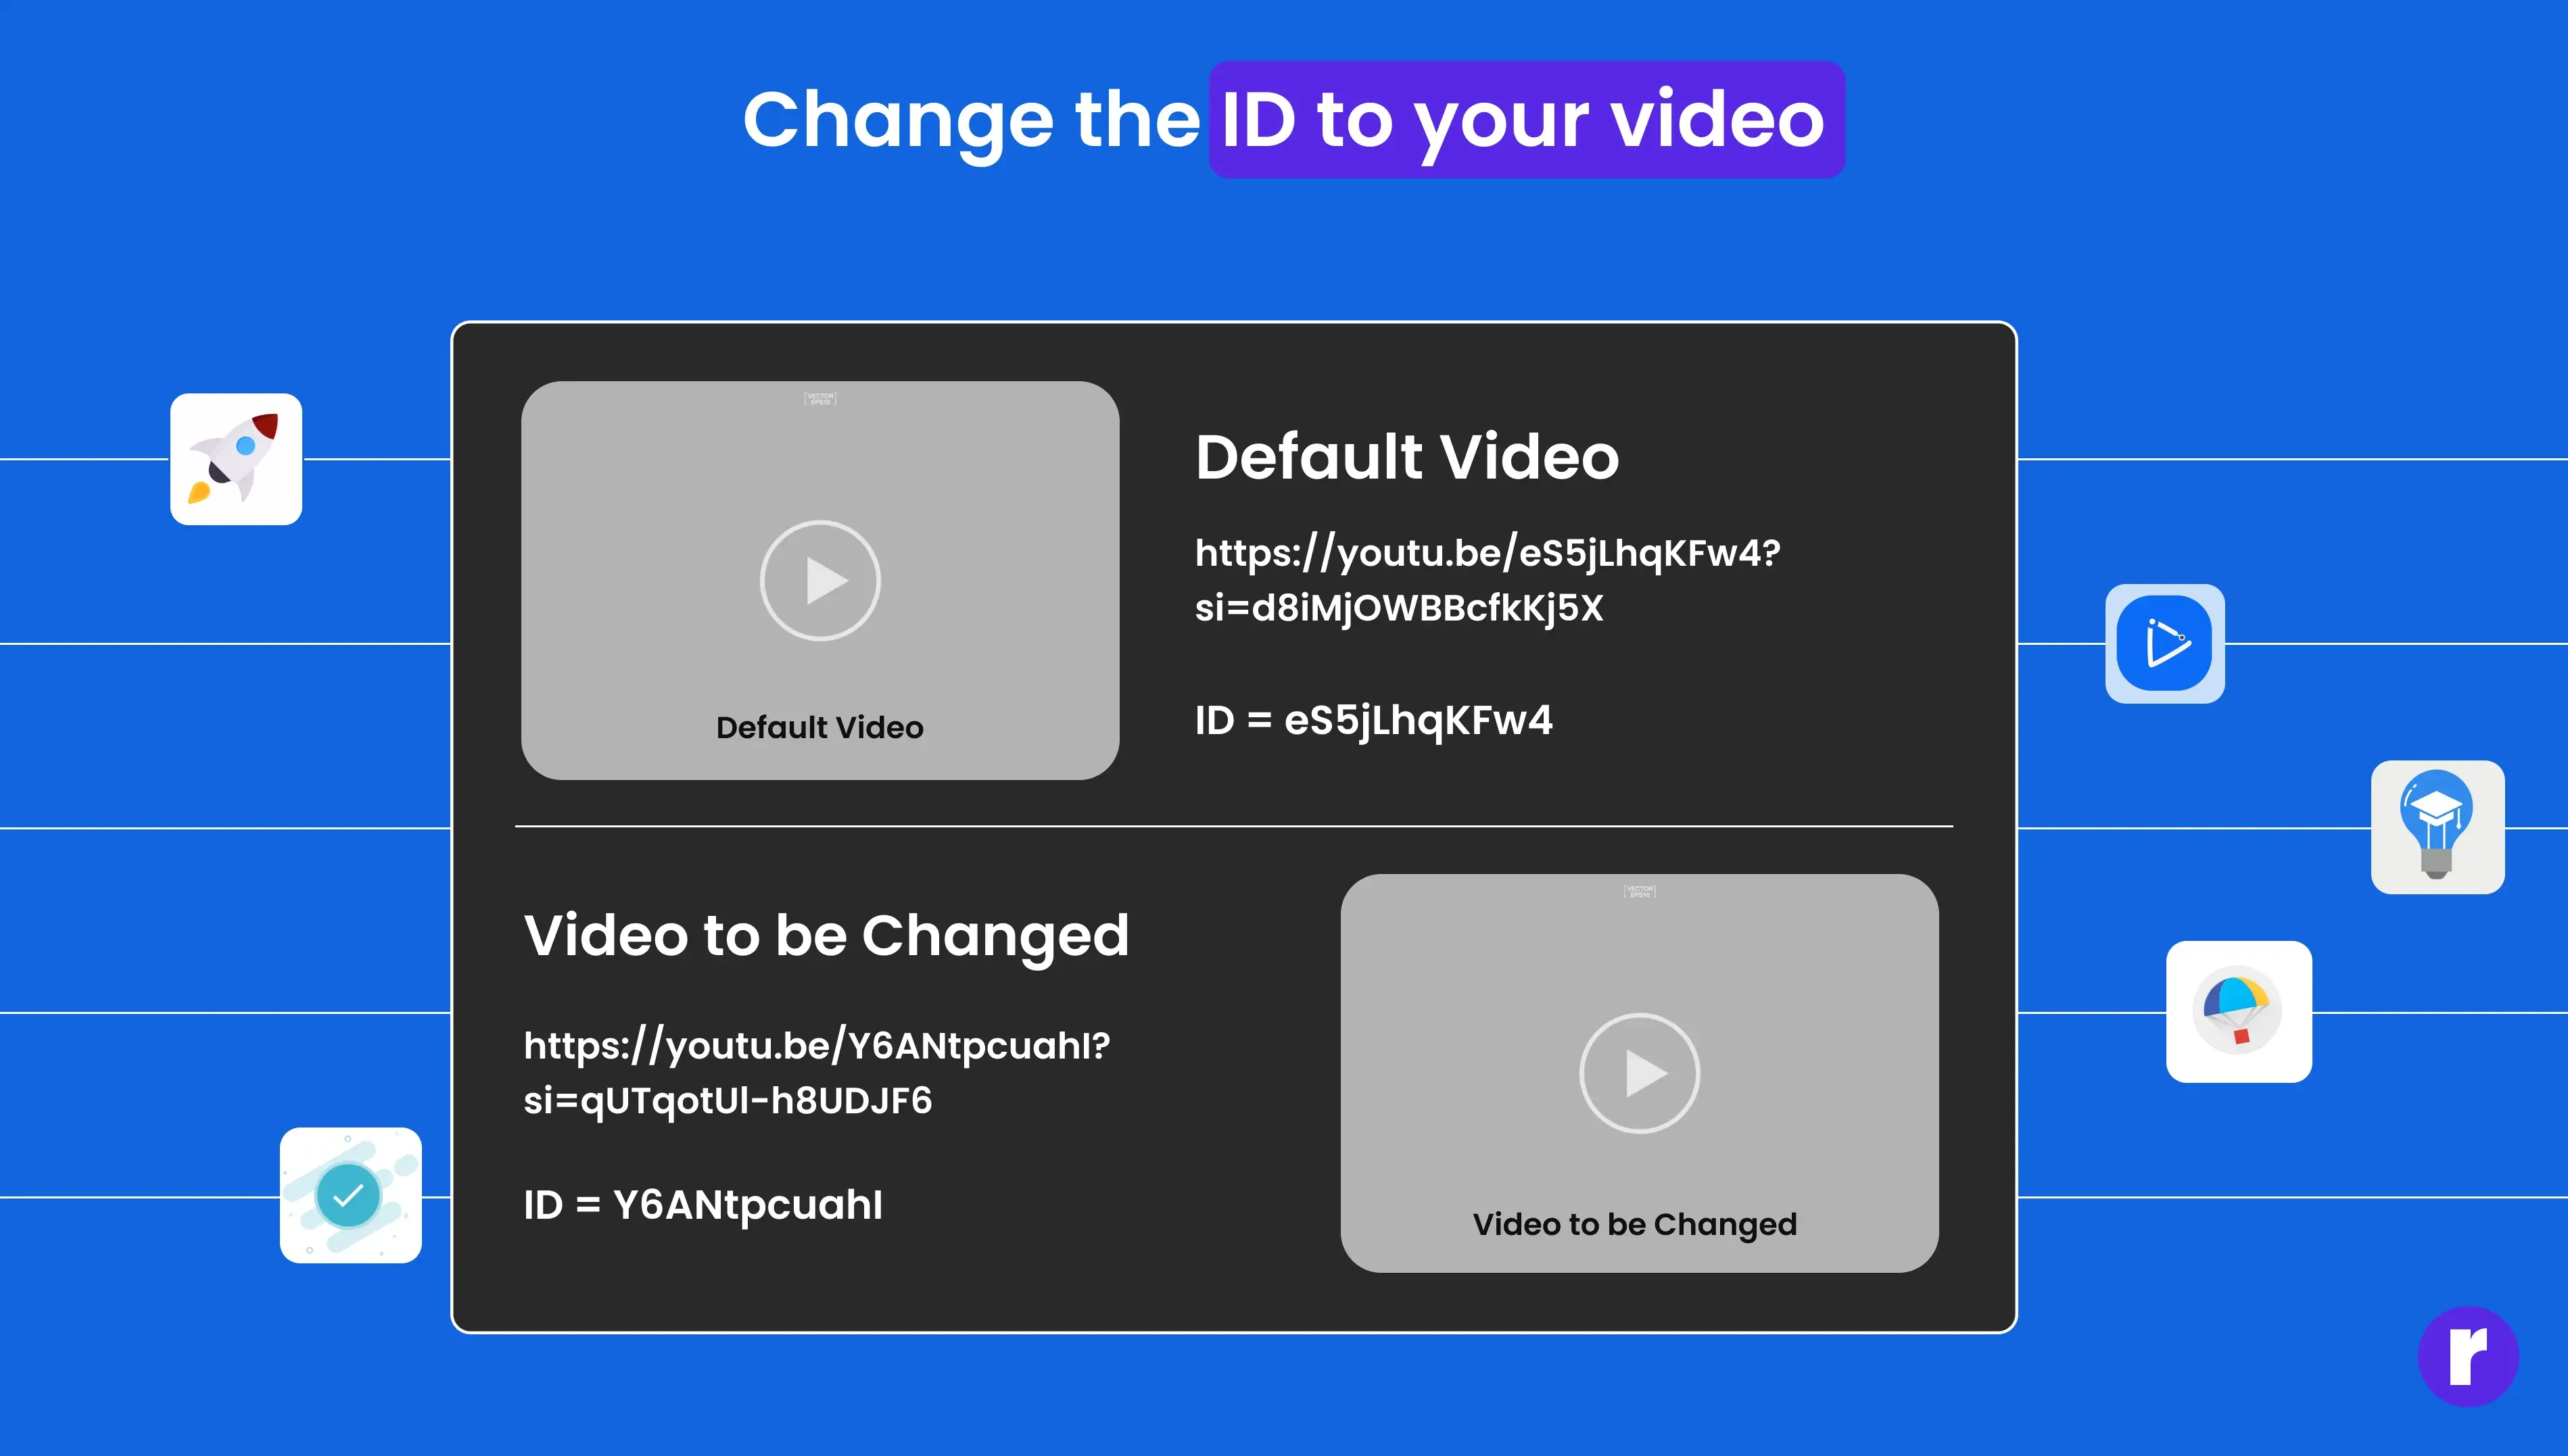
- The src attribute contains the YouTube video URL.
- Replace eS5jLhqKFw4 with your desired video ID.
<iframe class="video" src="https://www.youtube.com/embed/eS5jLhqKFw4?enablejsapi=1&html5=1&mute=1" frameborder="0" allowfullscreen style="width:100%; height:100%;"></iframe>
This code ensures that the video will fit perfectly inside the Div.
Step 5: Set the Height and Width of the Embed Code
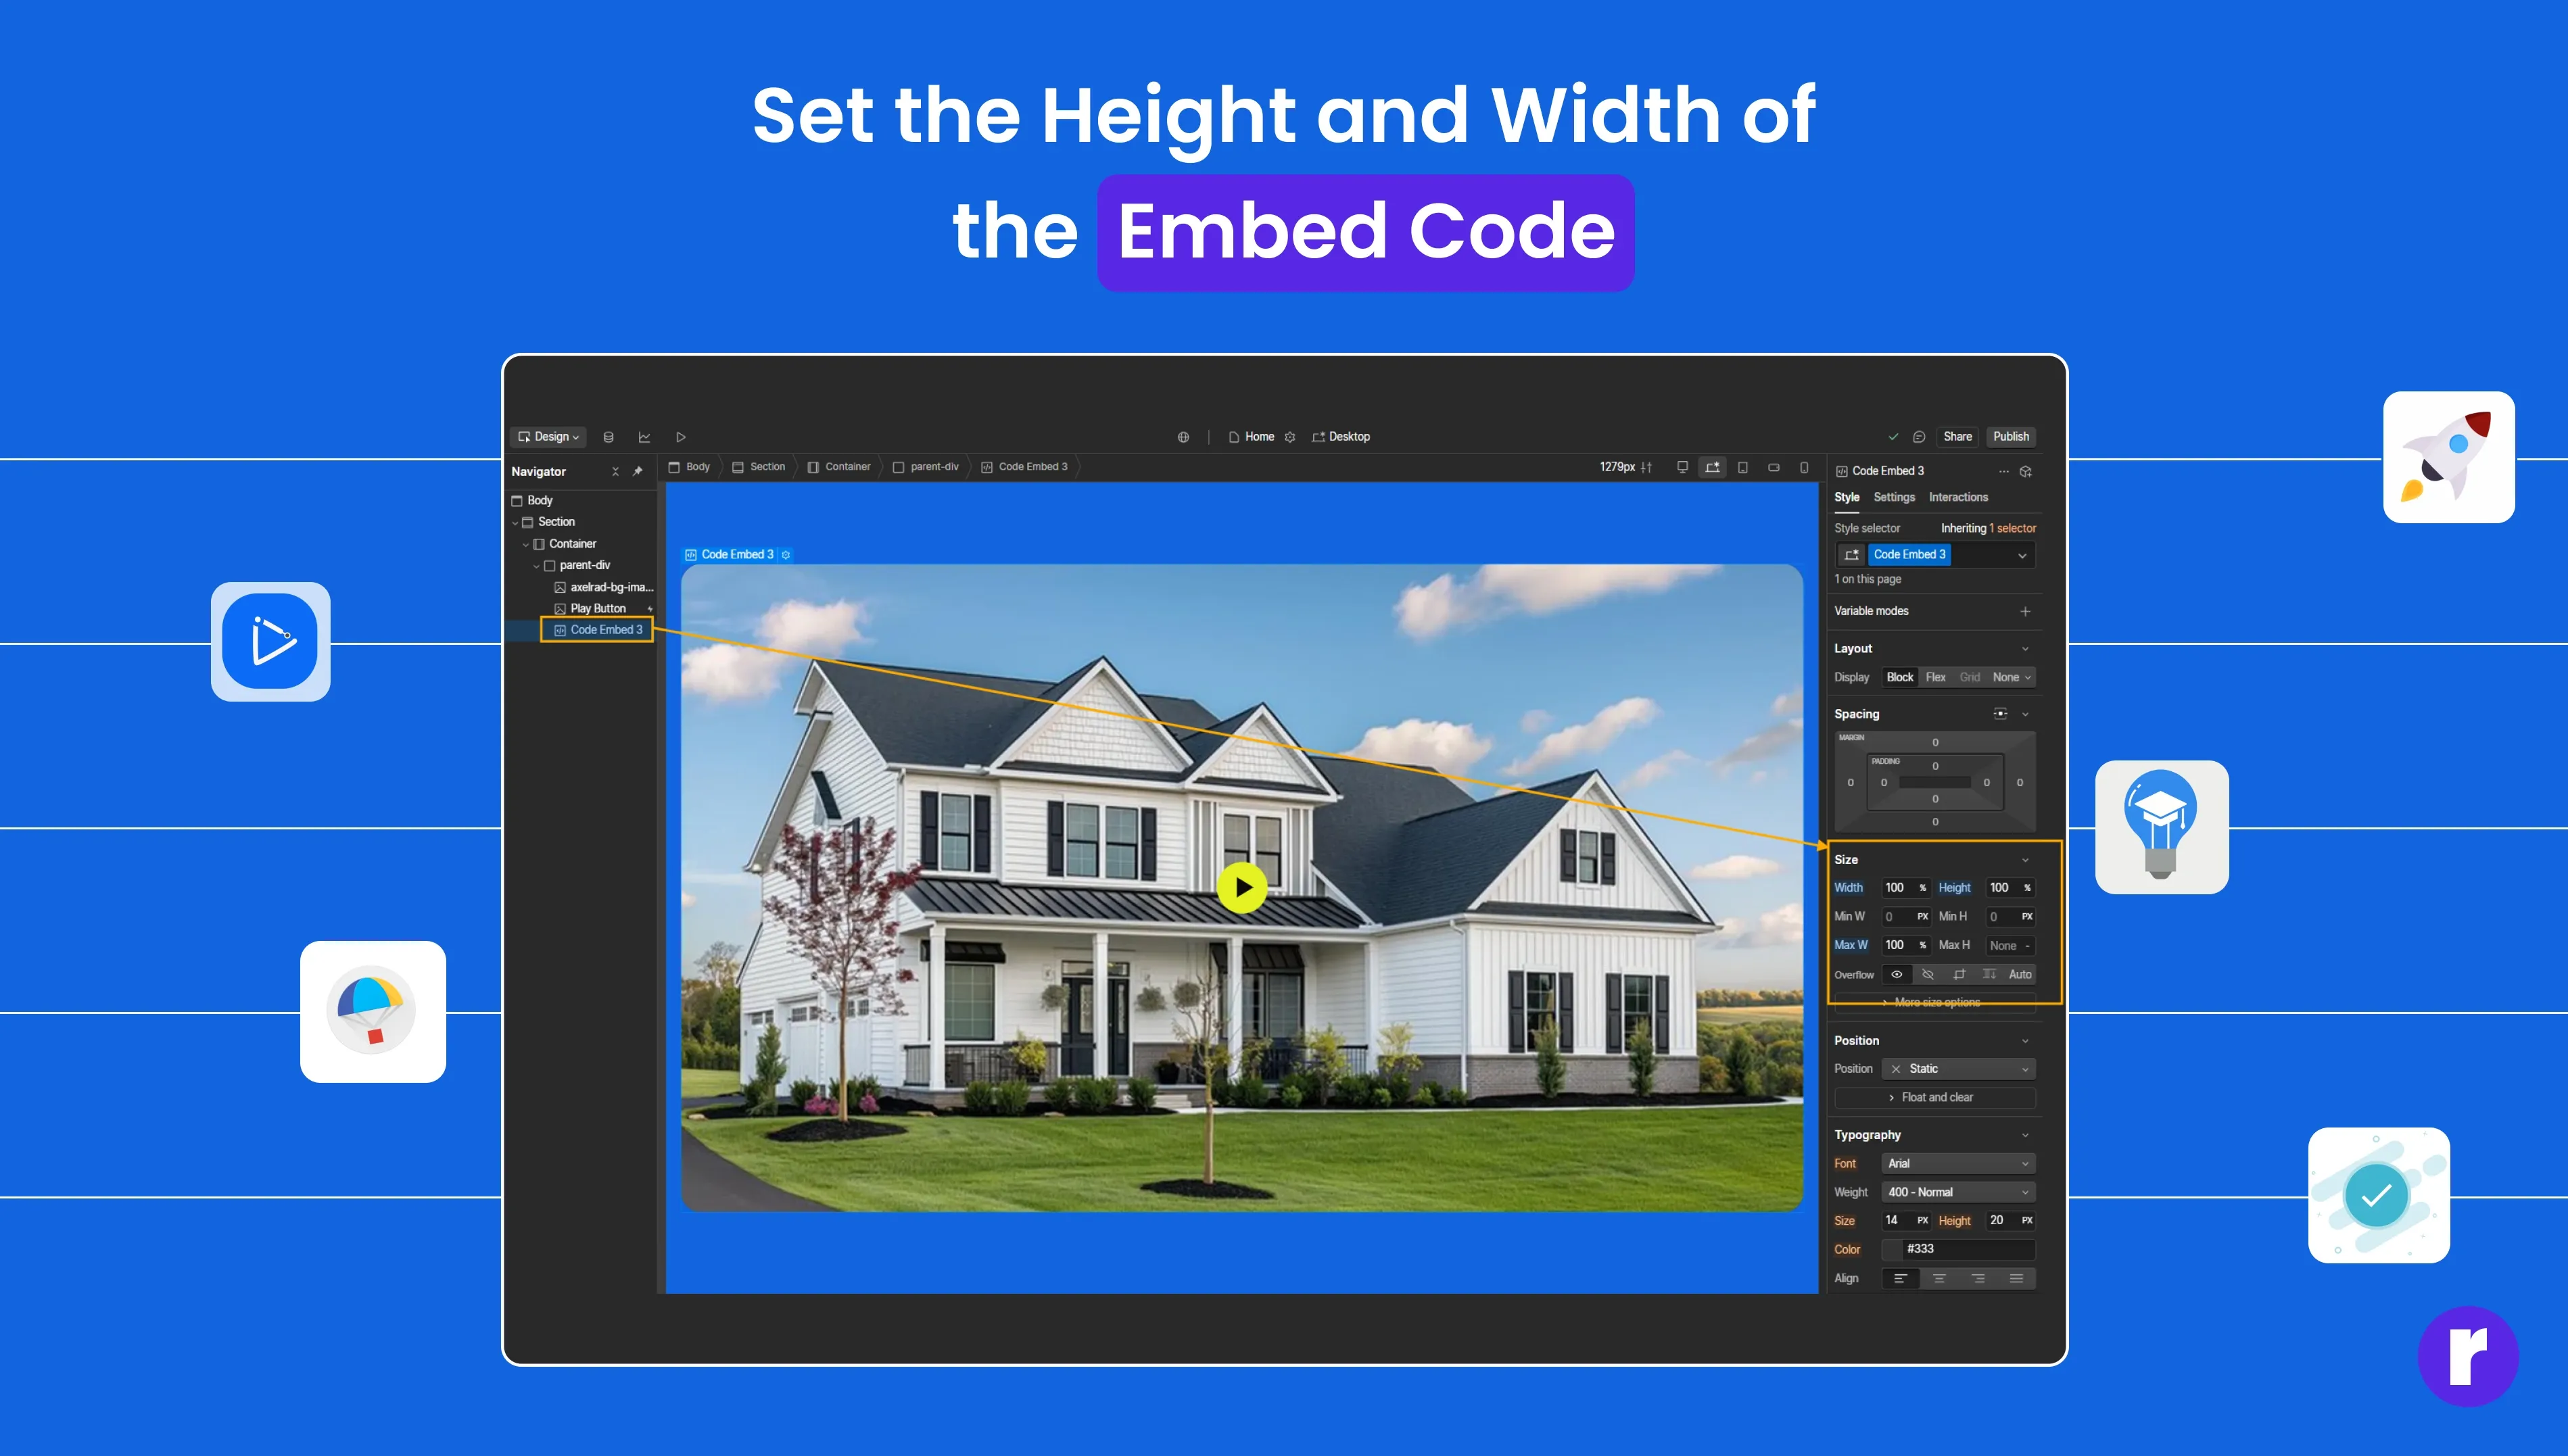
Make sure the video fills the Div:
- Adjust the iframe's width and height to fill 100% of its container.
- This ensures the video takes up the full height and width of the Div you set earlier.
Step 6: Add an Overlay Image (Optional)

If you want to display an overlay image on top of the video (e.g., a thumbnail) that disappears when the play button is clicked:
- Drag an Image element inside the Div Block (class-name).
Set the position of the image to absolute and set its width and height to 100%. Ensure the image scales to completely cover the div.
Step 7: Add the Play Icon
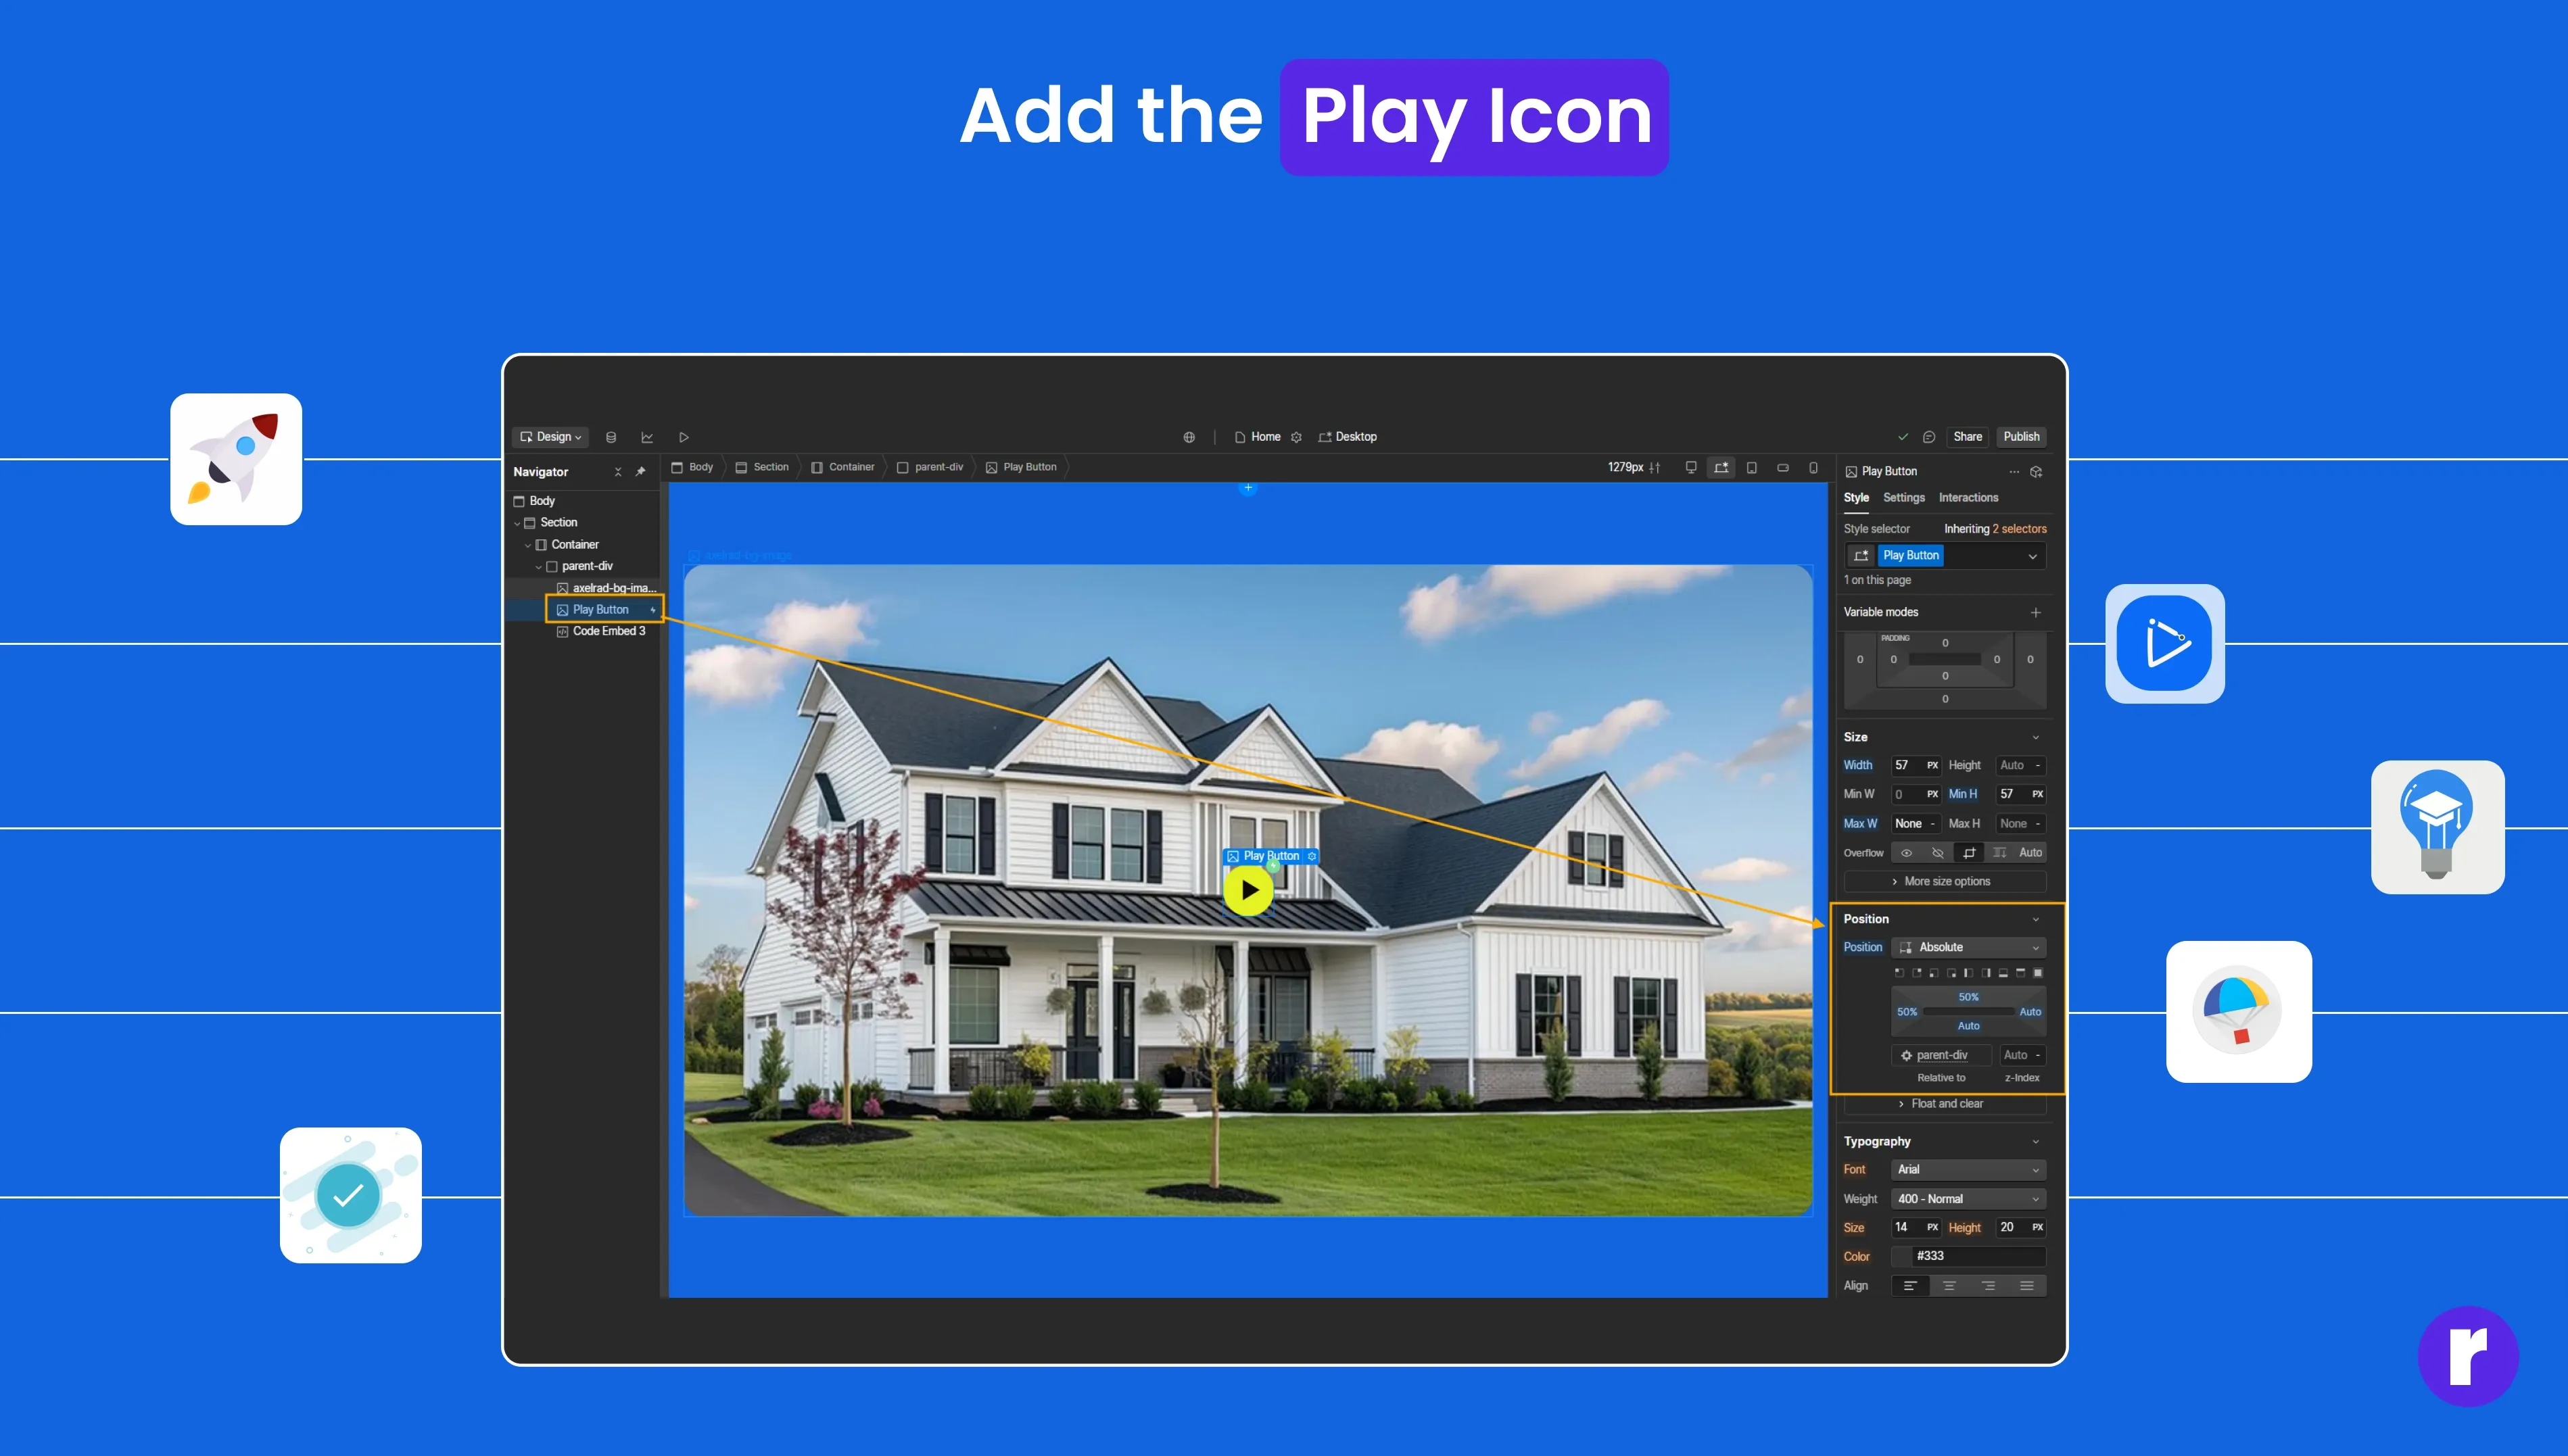
Now, let’s add the play icon:
- Drag an Icon Image (like a play button) into the Div Block (class-name).
- Set the position of the icon to absolute.
- Use the transform property to center the icon:
- Set translate to 50% for both X and Y axes to center the icon within the Div.
Step 8: Set the Icon to Play the Video
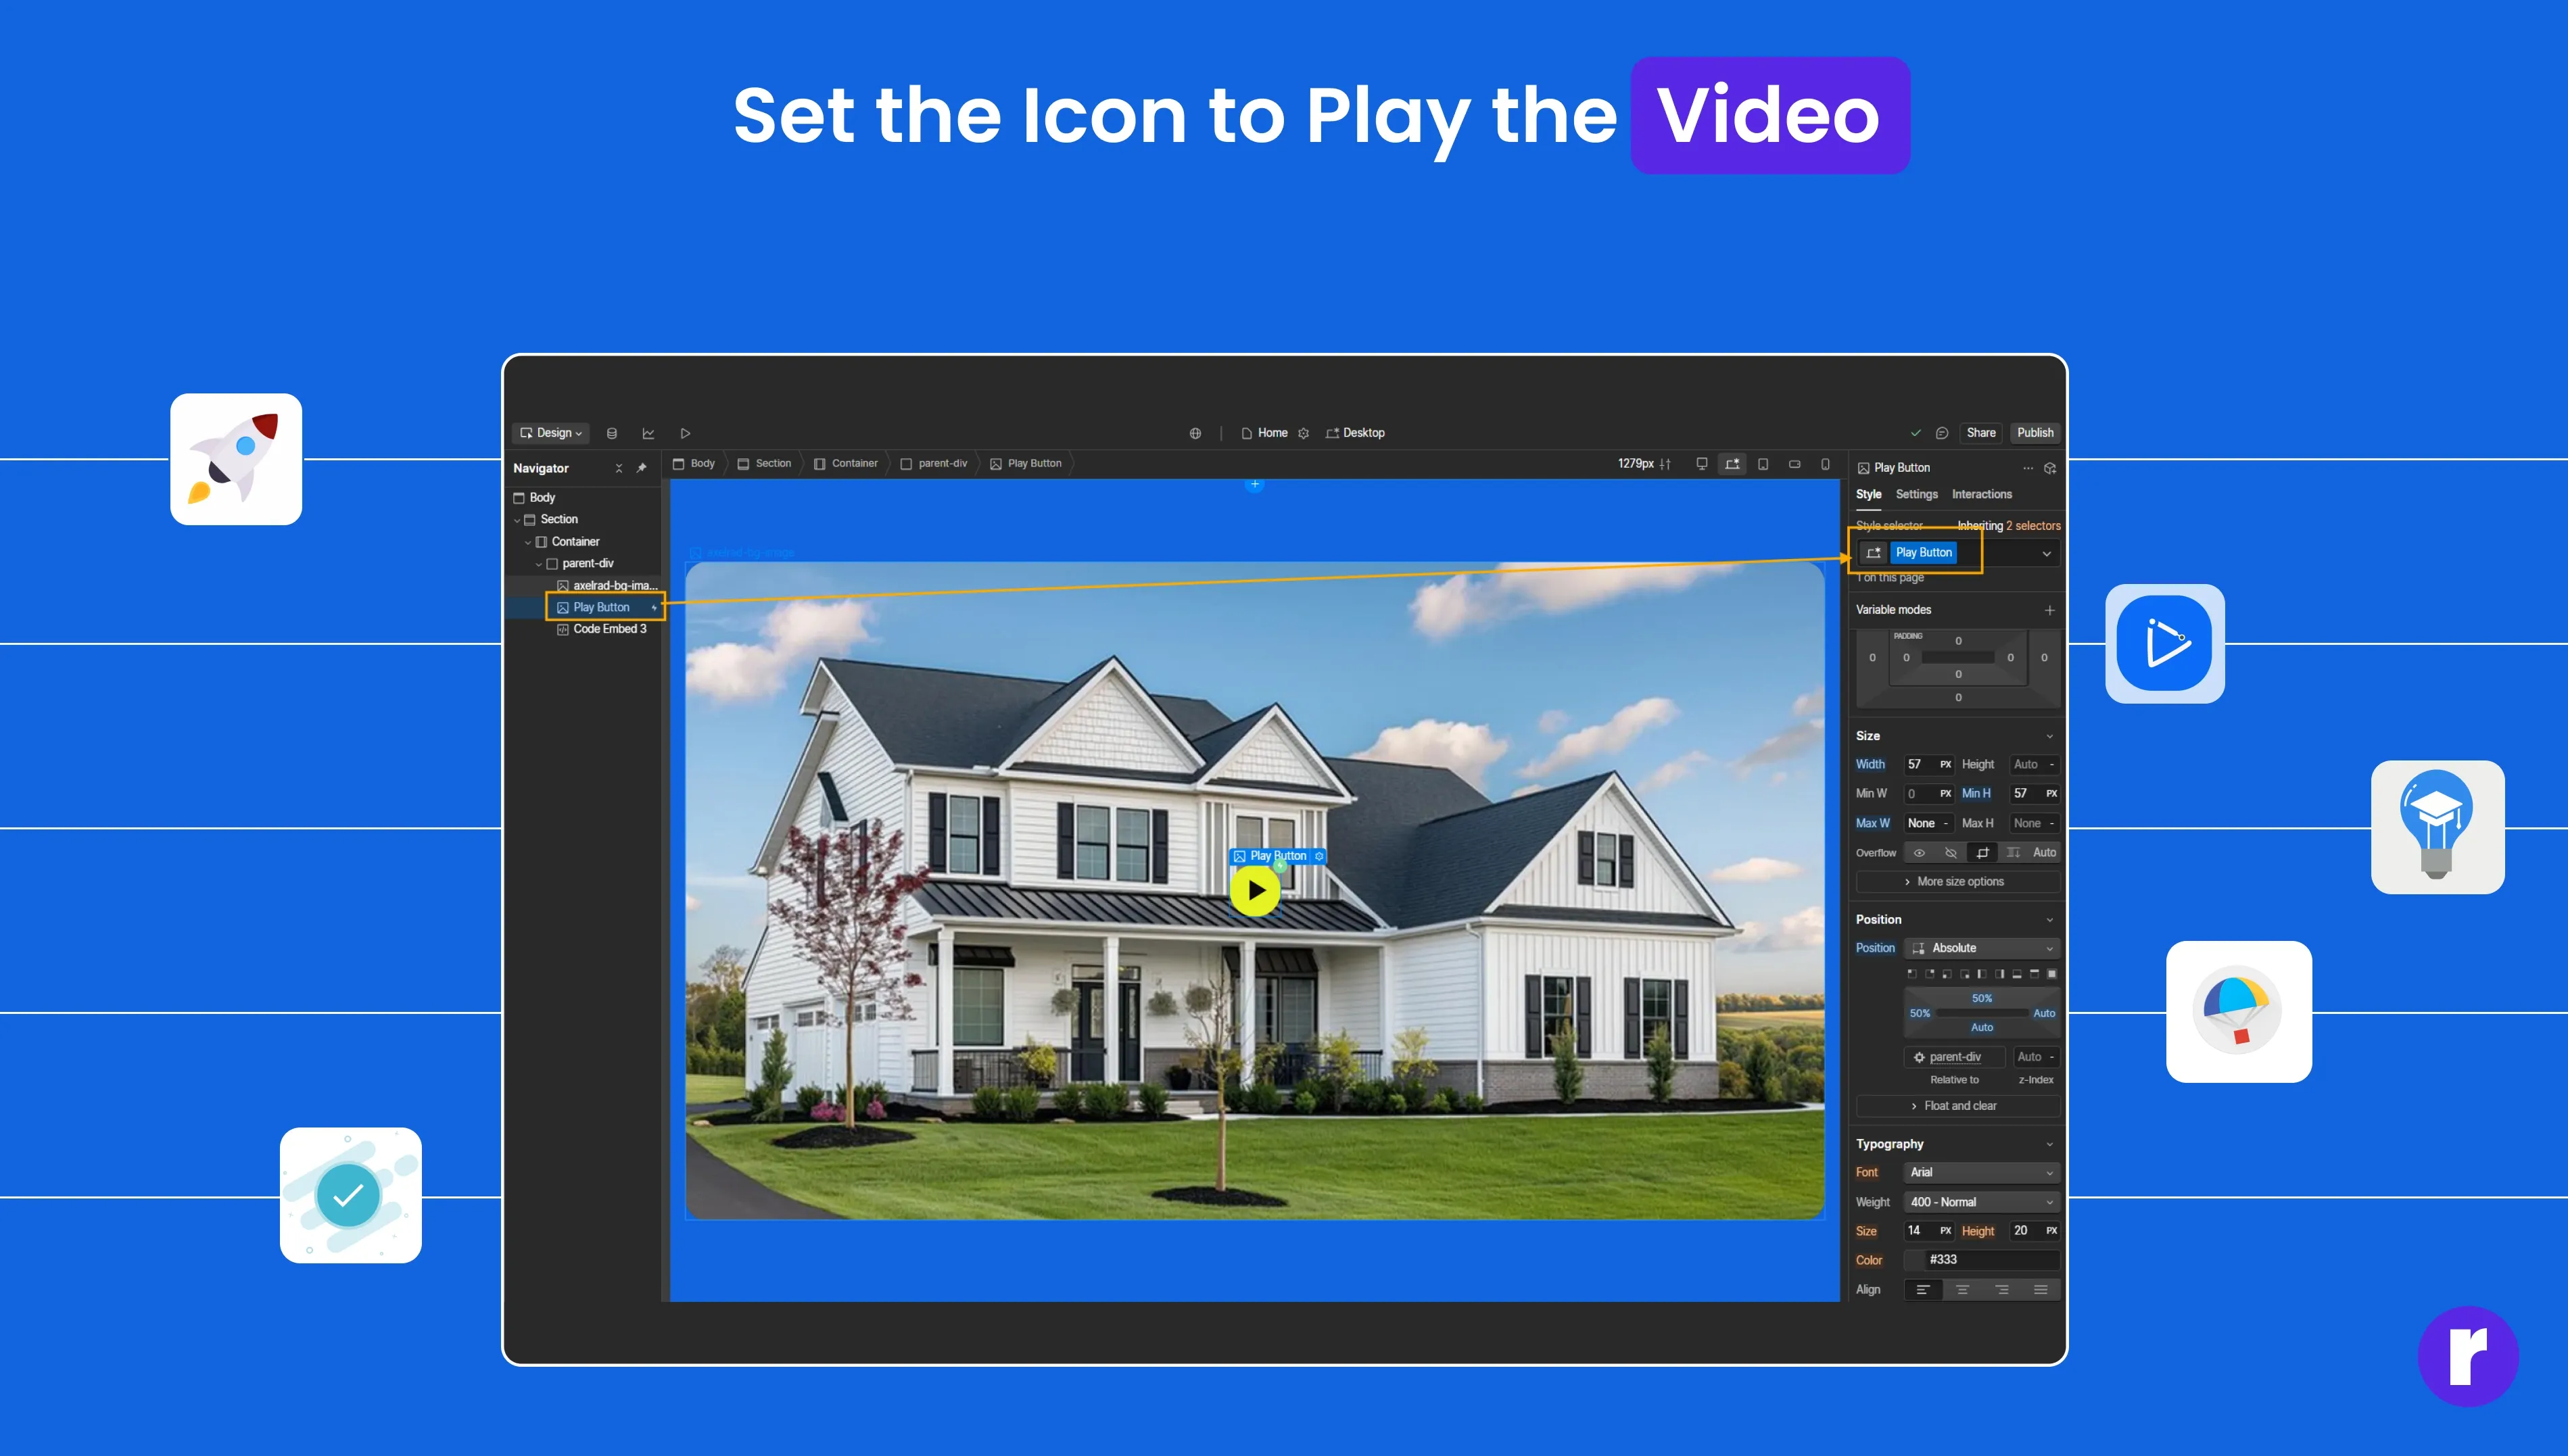
To enable the icon to start the video playback:
- Set the class of the icon to Play Button.
- If you want to change the video, simply replace the video ID in the URL. For example, change the video link to
- https://youtu.be/PjoP5wQH9dA?si=SFAGBZwB9is2zMxP - PjoP5wQH9dA is the new video ID.
Step 9: Hide the Image on Icon Click
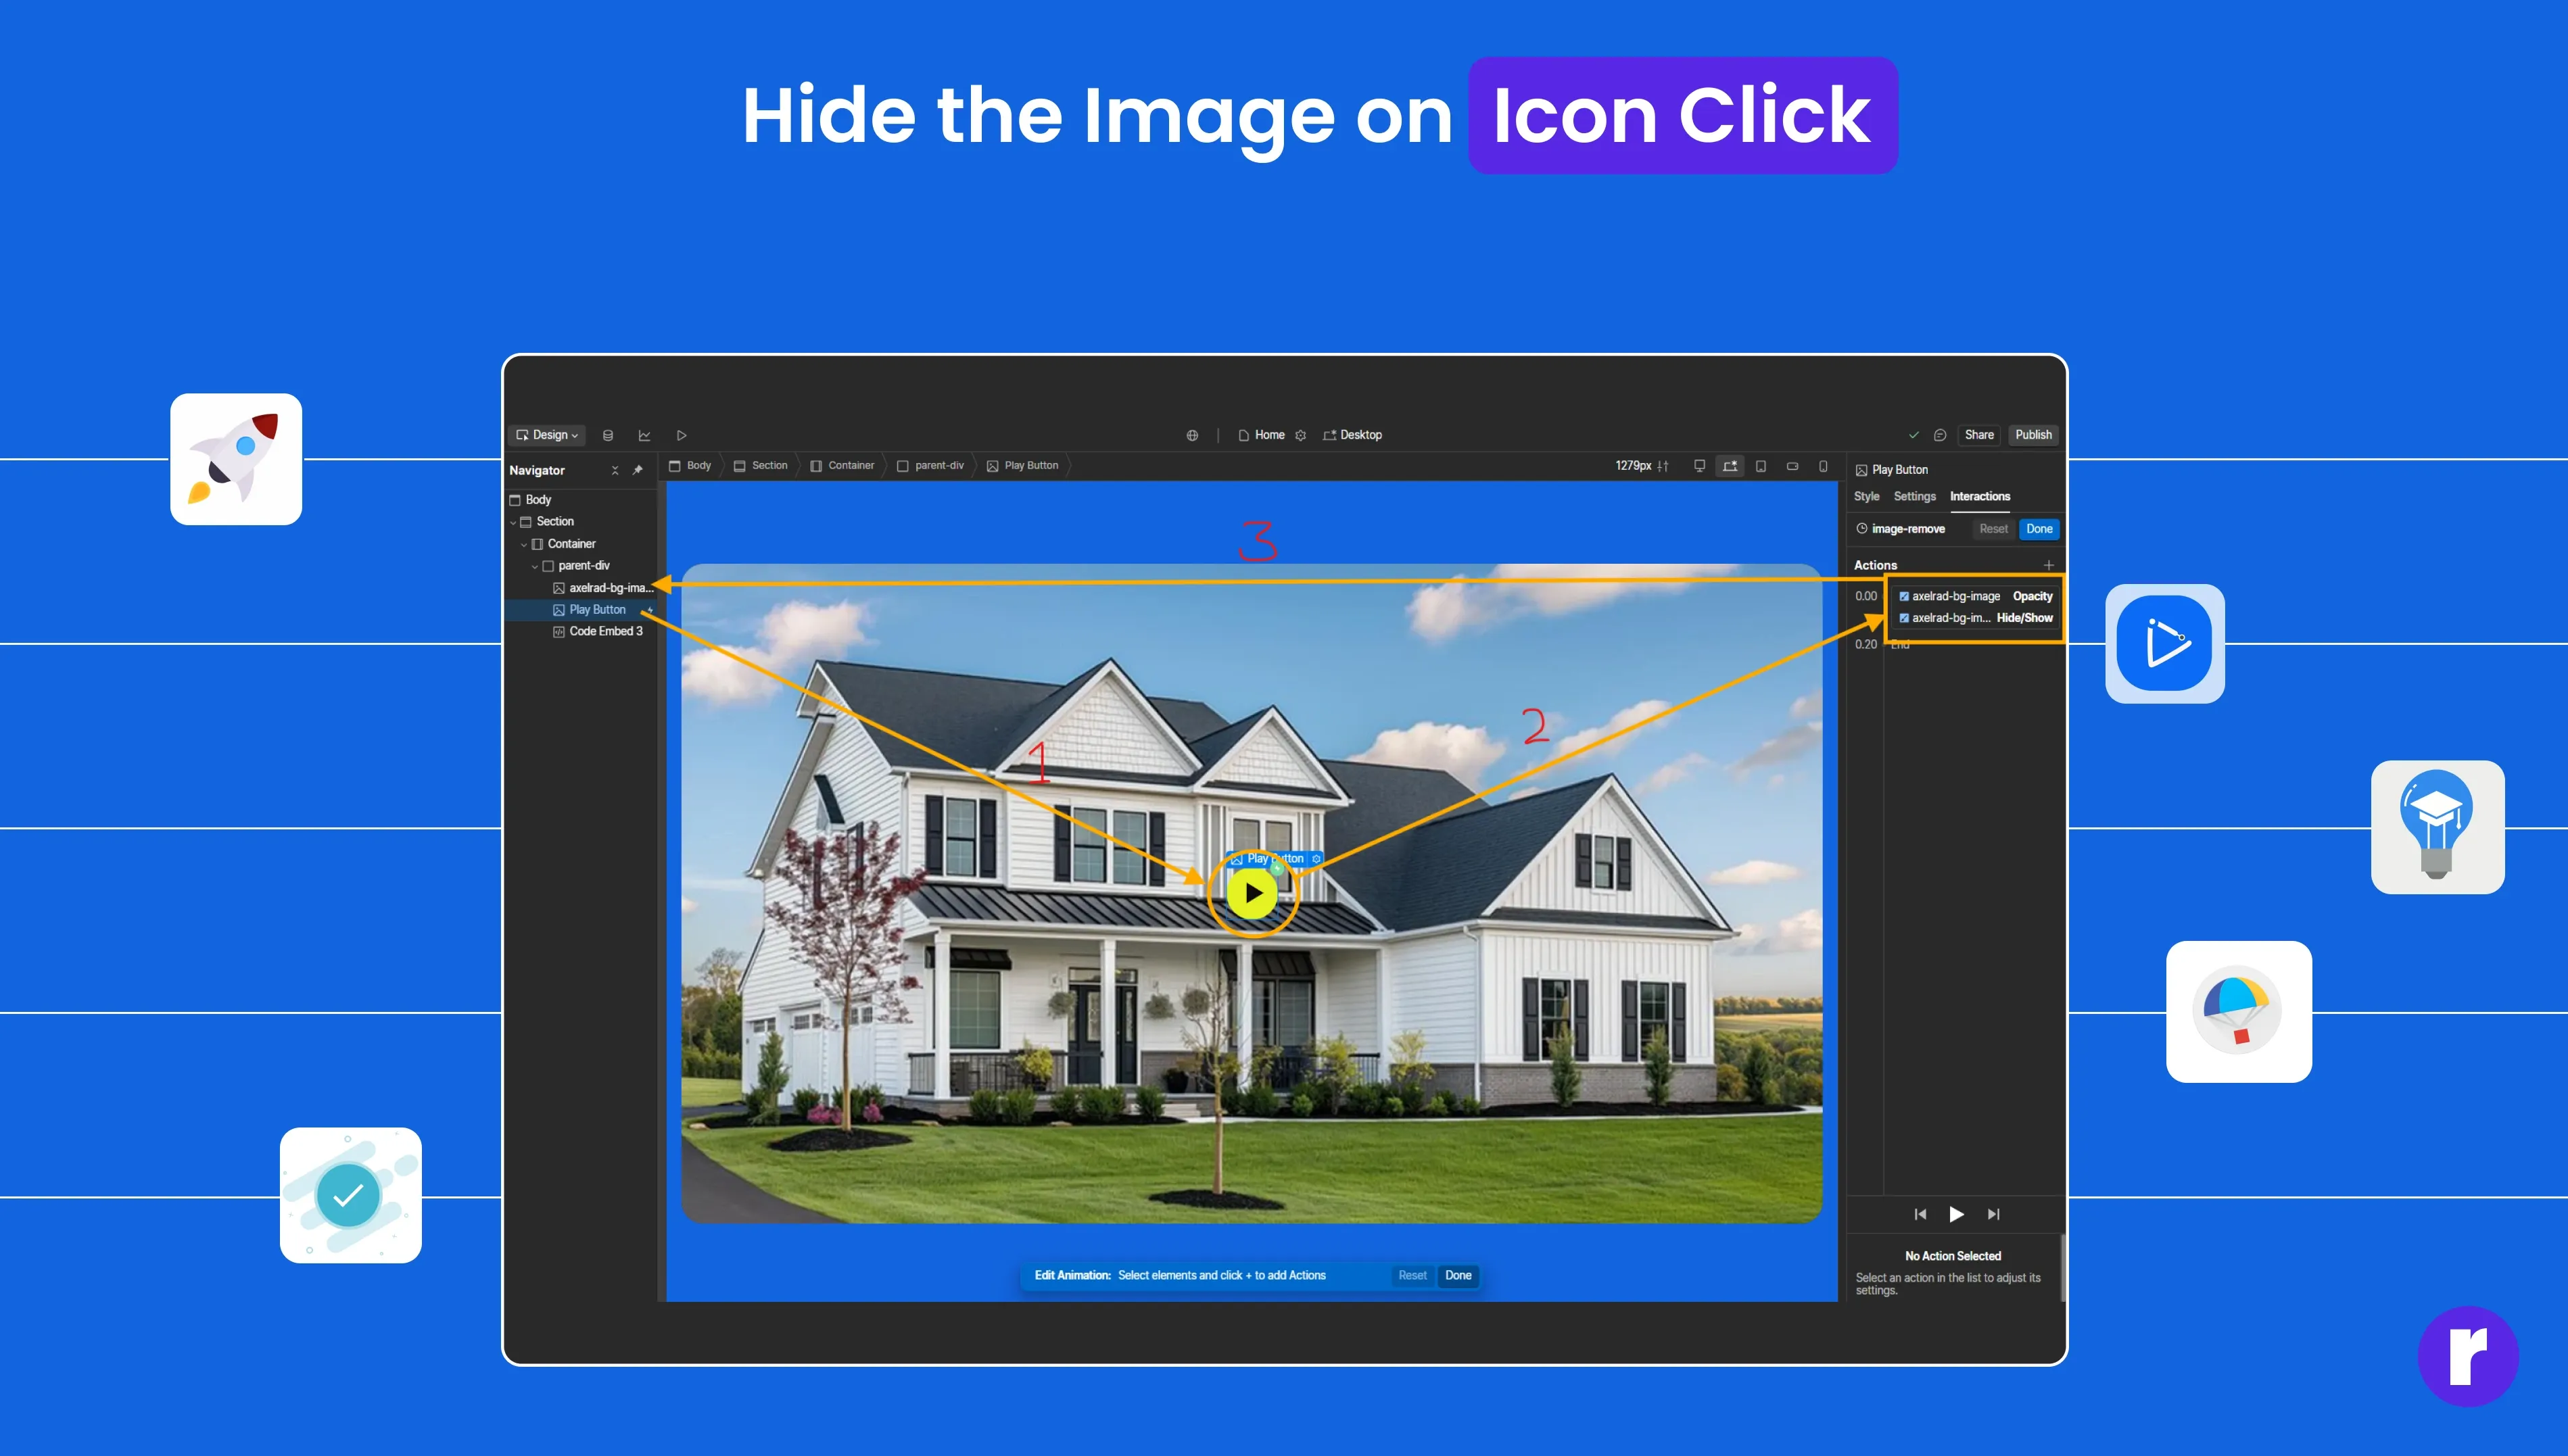
To remove the overlay image when the play icon is clicked:
- Go to the Interactions panel.
- Set up an interaction that hides the image once the play icon is clicked. This will reveal the video and start playing it.
Step 10: Publish and Test
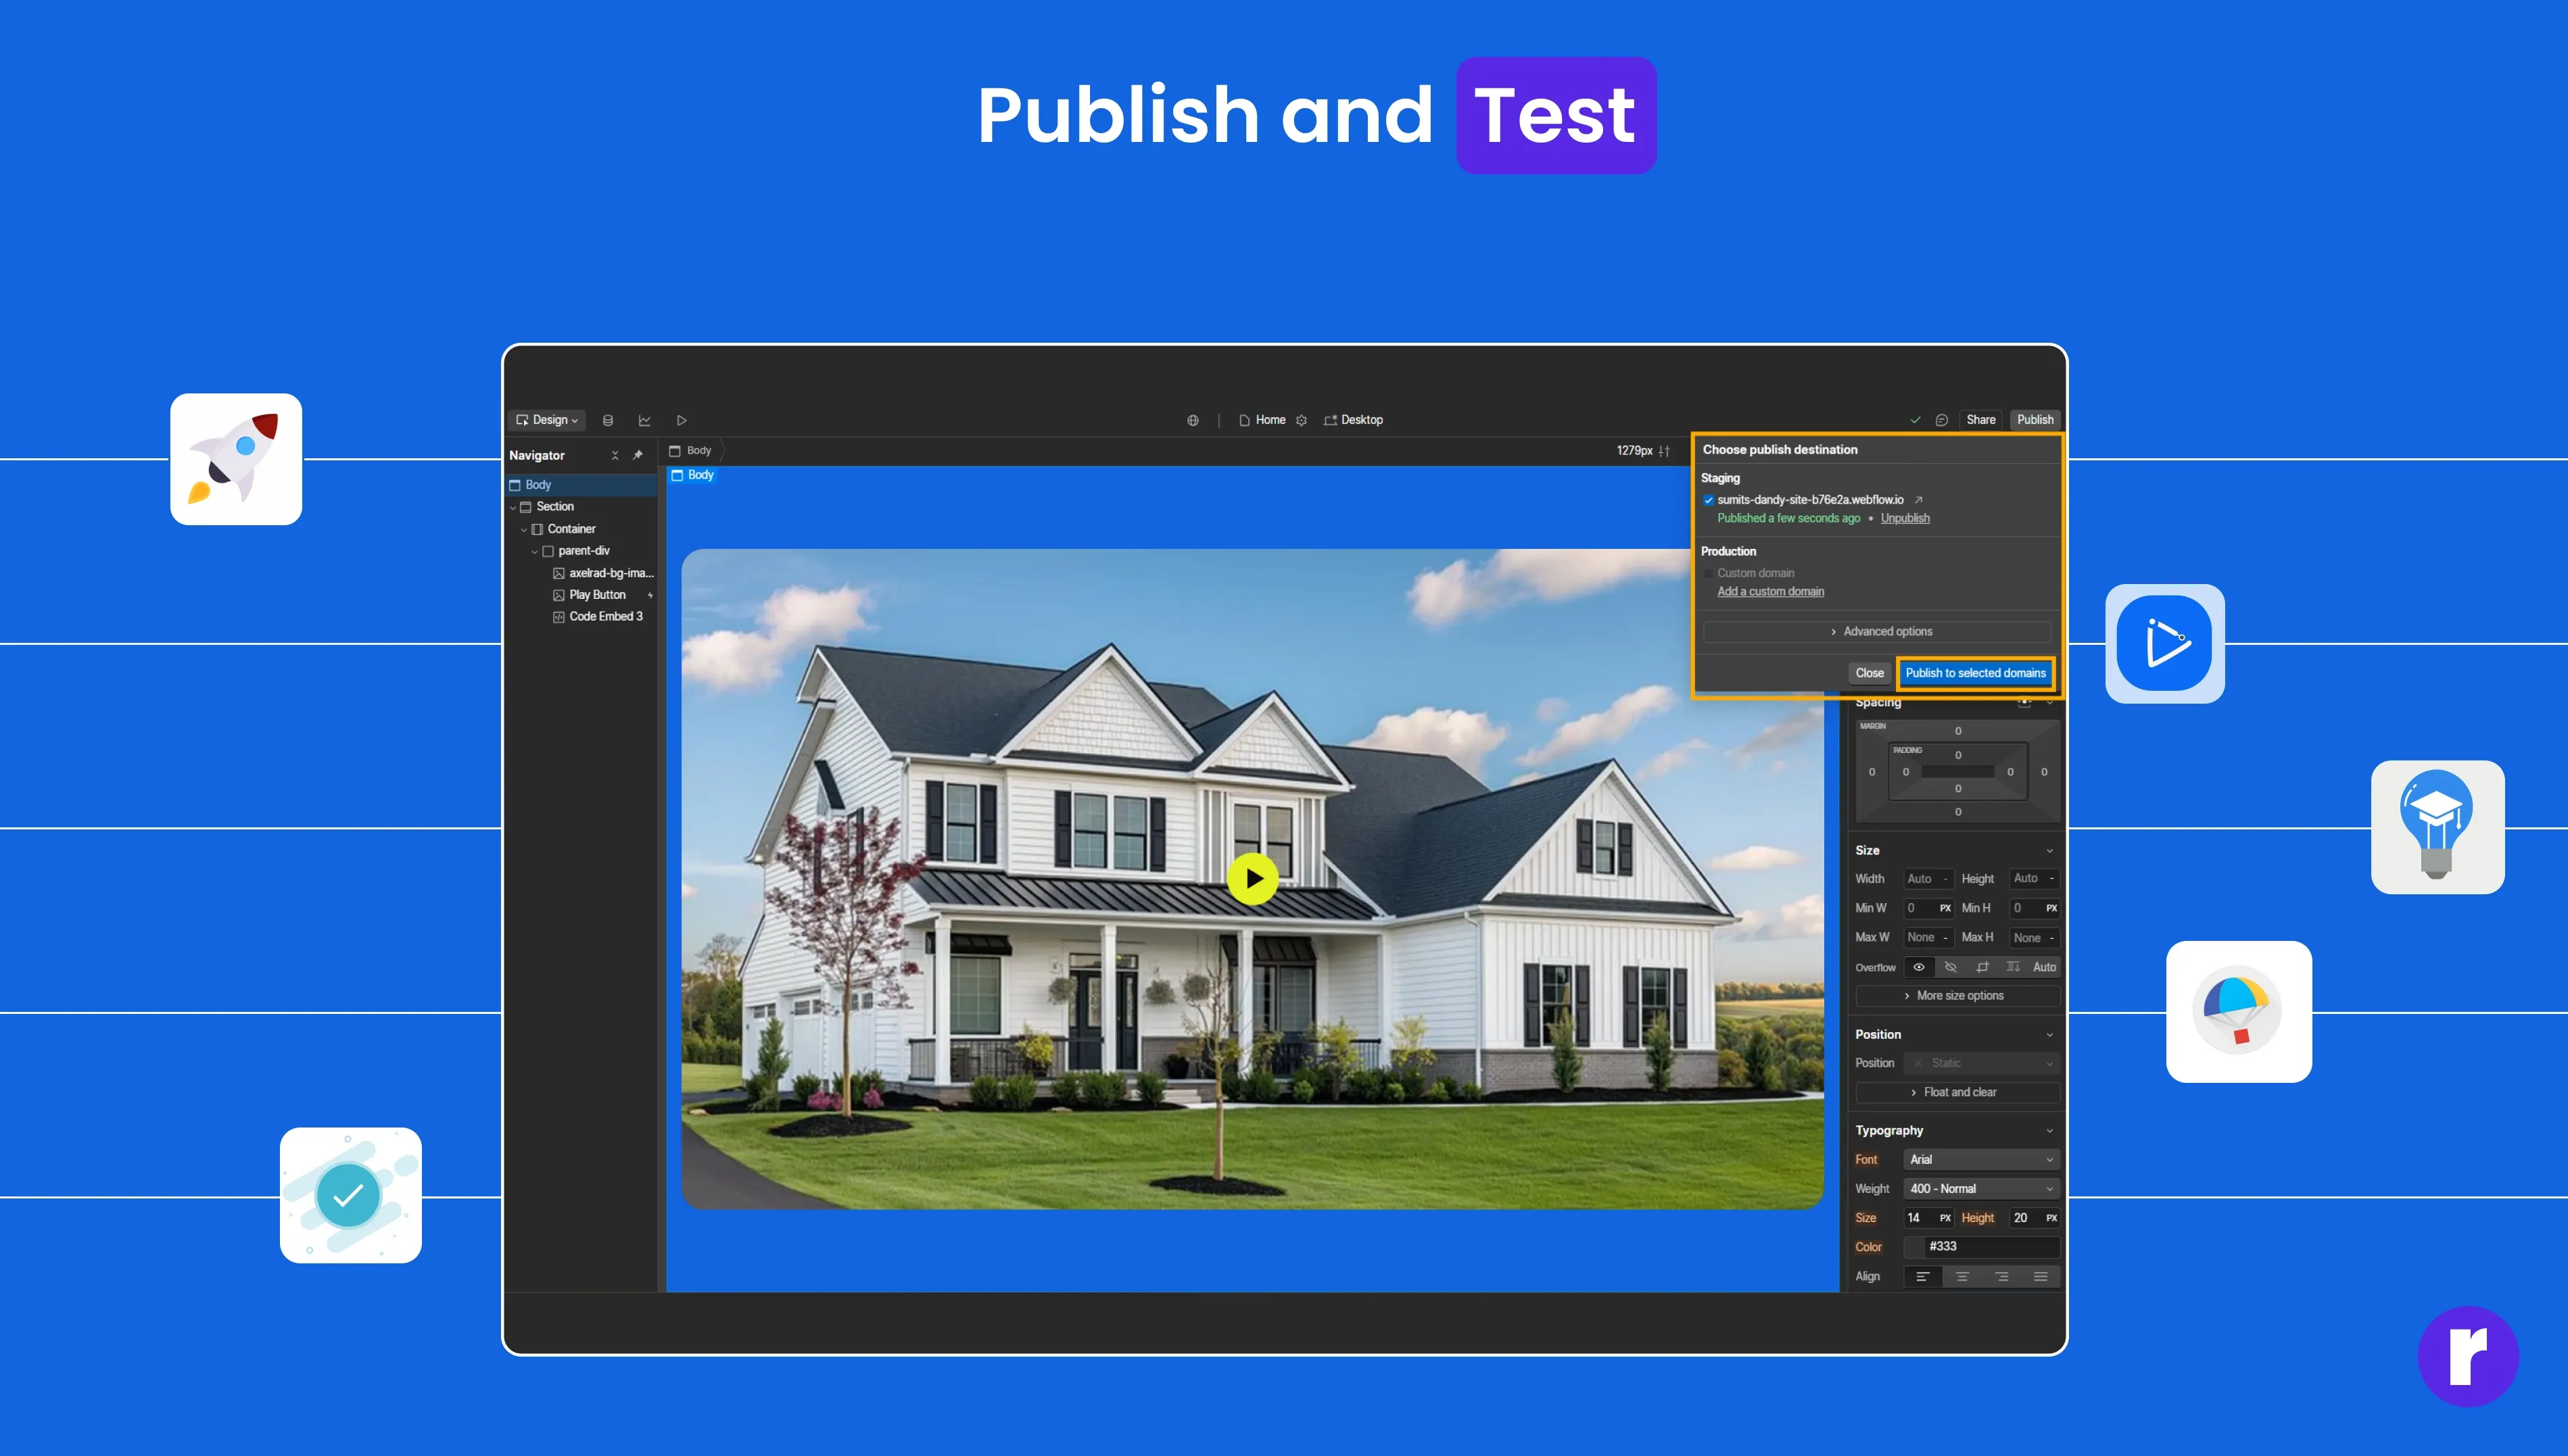
Once everything is set up:
- Publish the site..
- Test the website by clicking the custom icon. The video should start playing, and the overlay image will disappear.
Conclusion
That’s it! You’ve now created a fully interactive setup in Webflow where clicking your custom icon starts the embedded YouTube video. It’s a clean, user-friendly solution for adding interactive video features to your site.
Feel free to tweak the styles and interactions as needed, and you can even customize the appearance of the play button and video overlay to match your design.
Want to level up your Webflow game? Check out Radial code.